
As I stood in my kitchen, a nostalgic aroma wafted through the air, easily transporting me back to carefree summer days and birthday parties filled with laughter. It's amazing how comfort food can evoke such warm memories! That’s exactly why I’m excited to share my incredible No-Bake Twinkie Pudding Cake with you. This easy-to-make dessert combines the classic flavors of Twinkies with a creamy pudding layer that sets in the fridge, making it a fantastic option for busy days or spontaneous gatherings. And let me tell you, it’s both a crowd-pleaser and a fun way to indulge without heating up the oven. Curiosity piqued? Let’s dive into this deliciously simple recipe!
Why is this Twinkie Pudding Cake a must-try?
Unforgettable Flavor: The delightful combination of Twinkies, creamy pudding, and chocolate creates a nostalgic and rich taste that everyone adores.
No-Bake Convenience: Perfect for hot days or when you're short on time, this cake requires no baking. Just mix, layer, and chill!
Effortless Preparation: With only six ingredients and a quick 20-minute prep time, you can whip it up with ease.
Crowd-Pleasing Appeal: Serve it at parties, family gatherings, or a simple weeknight dinner, and watch it disappear in no time!
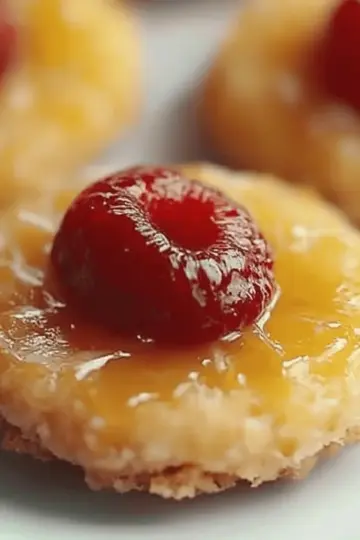
Versatile Garnishing: Top with maraschino cherries or extra chocolate chips to elevate its presentation and flavor.
No-Bake Twinkie Pudding Cake Ingredients
This delightful dessert comes together effortlessly with just a few key ingredients!
For the Cake Base
- Twinkies – the star of our recipe, providing sweetness and a nostalgic flavor that pairs perfectly with pudding.
- Instant Vanilla Pudding Mix – enhances the creaminess and adds a luscious texture to the cake.
For the Creamy Layer
- Milk – helps to create a smooth pudding consistency; you can use almond milk for a dairy-free alternative.
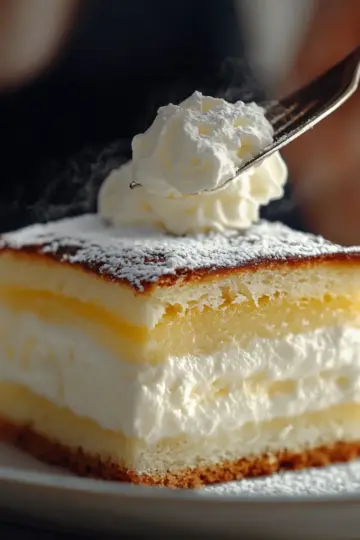
- Whipped Topping – gives the dessert a fluffy, airy texture; feel free to substitute with homemade whipped cream for extra richness.
For Topping
- Chocolate Chips – adds a delightful crunch and chocolatey richness that complements the other flavors well.
- Optional: Maraschino Cherries – a classic garnish that brings a pop of color and extra sweetness to your dessert.
Enjoy creating this No-Bake Twinkie Pudding Cake; it’s sure to be a hit with family and friends!
Step‑by‑Step Instructions for No-Bake Twinkie Pudding Cake
Step 1: Slice the Twinkies
Carefully cut each Twinkie in half lengthwise using a serrated knife for a clean cut. Place them neatly in a 9x13 inch baking dish, with the cream side facing up. This will serve as the base of your No-Bake Twinkie Pudding Cake, creating a visually appealing layer that captures that nostalgic flavor.
Step 2: Prepare the Pudding
In a large mixing bowl, combine the instant vanilla pudding mix with 2 cups of cold milk. Using a whisk, mix vigorously for about 2 minutes until the mixture is smooth and thickened slightly. This creamy pudding layer adds richness to your dessert, so ensure no lumps remain before proceeding.
Step 3: Fold in Whipped Topping
Gently fold in the 8 oz container of whipped topping into the prepared pudding mixture. Use a spatula and employ a careful folding technique to maintain the airy texture. Once well combined and smooth, this fluffy layer adds a light and creamy contrast to the Twinkie base, making your No-Bake Twinkie Pudding Cake truly delightful.
Step 4: Assemble the Layers
Pour the pudding and whipped topping mixture evenly over the Twinkies in the baking dish. Use a spatula to spread it out gently, ensuring all Twinkie pieces are covered. This beautiful layer showcases the creamy goodness that is key to your dessert.
Step 5: Add the Chocolate Chips
Sprinkle one cup of chocolate chips generously over the pudding layer, distributing them evenly for maximum flavor in each bite. The chocolate chips not only add a rich flavor but also a satisfying crunch to your No-Bake Twinkie Pudding Cake, making it irresistible.
Step 6: Refrigerate to Set
Cover the dish securely with plastic wrap and place it in the refrigerator to chill for at least 4 hours, or overnight if you can wait. This step allows the flavors to meld and the pudding to set properly. When you remove it, the No-Bake Twinkie Pudding Cake will be perfectly chilled and ready to serve.
Step 7: Garnish and Serve
Before serving, remove the plastic wrap. For a pop of color and extra sweetness, garnish with maraschino cherries atop the cake if desired. Slice into squares and serve chilled, delighting everyone with this unforgettably creamy and nostalgic dessert that will have them coming back for more!
Expert Tips for No-Bake Twinkie Pudding Cake
-
Use Fresh Twinkies: Ensure your Twinkies are fresh for the best flavor and texture. Older ones may be dry and not as delightful.
-
Proper Layering: Spread the pudding mixture evenly over the Twinkies to prevent any from sticking out or being too sparse, ensuring everyone gets a delicious bite.
-
Refrigeration Time: Don’t rush the chilling process! Letting the cake set overnight intensifies flavors and gives a better texture.
-
Texture Matters: Be gentle when folding the whipped topping into the pudding. This keeps the cake light and fluffy, enhancing the creamy experience.
-
Customization: Feel free to add your favorite mix-ins, like crushed nuts or berries, to customize your No-Bake Twinkie Pudding Cake and make it even more special.
What to Serve with No-Bake Twinkie Pudding Cake
Discover the perfect accompaniments that will elevate your dessert experience and create a memorable meal.
- Fresh Berries: The tartness of strawberries or raspberries offers a delightful contrast to the sweetness of the pudding cake.
- Chocolate Ice Cream: A scoop of rich chocolate ice cream adds an extra layer of indulgence, creating a perfect pairing.
- Homemade Whipped Cream: Enhance the creaminess with a dollop of homemade whipped cream, making each bite even more luxurious.
- Crunchy Graham Cracker Crust: Serve on a bed of crushed graham crackers for added texture and a delightful crunch alongside the soft cake.
- Nutty Caramel Sauce: Drizzle salty caramel sauce for a sweet and savory balance that will leave your taste buds dancing.
- Coffee or Espresso: A warm cup of coffee or espresso pairs beautifully, offering a satisfying contrast to the creamy dessert.
- Minty Fruit Salad: A brightly colored fruit salad with a hint of mint adds freshness, and it helps cleanse the palate between bites.
- Milkshakes: Whip up a classic vanilla or chocolate milkshake to complement the dessert, making for a playful and nostalgic treat.
- S’mores Dip: Serve alongside a warm s'mores dip for an interactive dessert experience that beckons guests to indulge further.
No-Bake Twinkie Pudding Cake Variations
Feel free to unleash your creativity and customize this No-Bake Twinkie Pudding Cake into a delightful treat that caters to your taste!
-
Dairy-Free: Substitute milk with almond or coconut milk and use a dairy-free whipped topping for a creamy, vegan option.
-
Chocolate Lovers: Replace chocolate chips with chopped dark chocolate or drizzle melted chocolate on top for an extra indulgent finish. The added richness will elevate each slice.
-
Fruity Twist: Layer in fresh strawberries or bananas between the Twinkies for a fruity surprise, creating both flavor and a beautiful presentation.
-
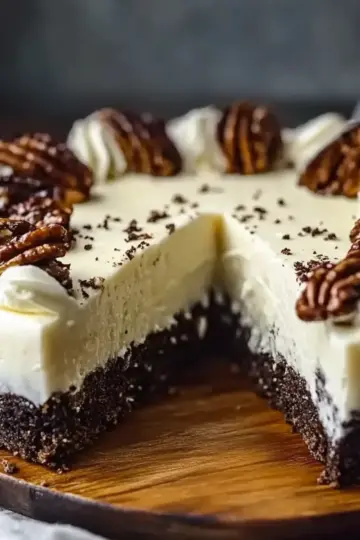
Nutty Crunch: Add a sprinkle of chopped nuts, like walnuts or pecans, over the pudding layer for added crunch and a delightful contrast in texture.
-
Minty Fresh: Mix in a few drops of peppermint extract to the pudding for a refreshing minty flavor that dances on your palate.
-
Spicy Touch: Stir in a pinch of cinnamon or a dash of cayenne pepper for a quirky twist that adds warmth and surprises to every bite.
-
Different Pudding Flavors: Experiment with chocolate or butterscotch pudding for alternative flavor profiles that keep everyone guessing!
-
Layered Delight: Create individual servings in cups for a fun presentation. Layer Twinkie pieces with pudding and chocolate chips, providing delightful textures in every spoonful.
How to Store and Freeze No-Bake Twinkie Pudding Cake
Fridge: Store leftovers in an airtight container in the fridge for up to 3 days to maintain freshness and creamy texture.
Freezer: While freezing isn’t recommended due to the delicate pudding layer, you can freeze portions for up to 1 month. Thaw in the fridge overnight when ready to enjoy.
Reheating: There’s no need to reheat; serve chilled straight from the fridge for the best taste. Garnish with fresh cherries just before serving for an appealing finish!
Make Ahead Options
These No-Bake Twinkie Pudding Cakes are perfect for meal prep, saving you time during busy weeknights or special occasions! You can assemble the layers (up to 24 hours in advance) and refrigerate the completed dessert. Just ensure the dish is well covered with plastic wrap to maintain freshness and prevent drying out. When you're ready to serve, simply garnish with maraschino cherries, slice, and enjoy the creamy, nostalgic goodness without any extra effort! This way, everyone can dive into a delicious treat that tastes just as heavenly, even after being prepped ahead of time.
No-Bake Twinkie Pudding Cake Recipe FAQs
What type of Twinkies should I use?
Absolutely fresh Twinkies are a must! They provide the best flavor and texture for your No-Bake Twinkie Pudding Cake. If you notice any that are past their prime or have dark spots, it’s best to skip those for a perfect dessert experience.
How should I store leftovers?
You should store any leftovers in an airtight container in the refrigerator for up to 3 days. This keeps the pudding creamy and maintains the cake’s delightful texture. If you find you can’t finish it all, don’t worry too much—just be sure to cover it well!
Can I freeze the No-Bake Twinkie Pudding Cake?
While I normally wouldn’t recommend freezing entire cakes due to the delicate pudding layer, you can freeze portions for up to 1 month. Just slice the cake, wrap each piece tightly in plastic wrap, and then place them in a freezer bag. When you're ready to indulge again, thaw in the refrigerator overnight to enjoy your treat!
What if my pudding doesn’t thicken properly?
If your pudding mixture doesn't thicken as expected, you might need to whisk it a bit longer, aiming for 2-3 minutes until smooth. If the lumps persist, try a blender for a super creamy texture. Just be cautious—over-mixing can lead to a runny consistency.
Are there any allergy considerations to keep in mind?
Yes, definitely! The Twinkie Pudding Cake contains dairy from the milk and whipped topping. If you’re serving those with dietary restrictions, consider using almond or coconut milk as a dairy-free alternative. Always check labels on pre-packaged items if allergies are a concern!
How can I customize my No-Bake Twinkie Pudding Cake?
There are so many ways to add a personal touch! You can mix in some crushed nuts or berries between the Twinkies and the pudding for an extra flavor kick. Another fabulous idea is to swap out chocolate chips for white chocolate for a whole new taste experience. Enjoy playing around with flavors!
Indulgent No-Bake Twinkie Pudding Cake You'll Love
Ingredients
Equipment
Method
- Slice the Twinkies in half lengthwise and place them in a baking dish with the cream side facing up.
- In a bowl, combine the pudding mix with milk and whisk until smooth.
- Fold in the whipped topping until fully combined.
- Pour the pudding mixture over the Twinkies and spread evenly.
- Sprinkle the chocolate chips over the pudding layer.
- Cover with plastic wrap and refrigerate for at least 4 hours.
- Garnish with maraschino cherries before serving.

Leave a Reply