
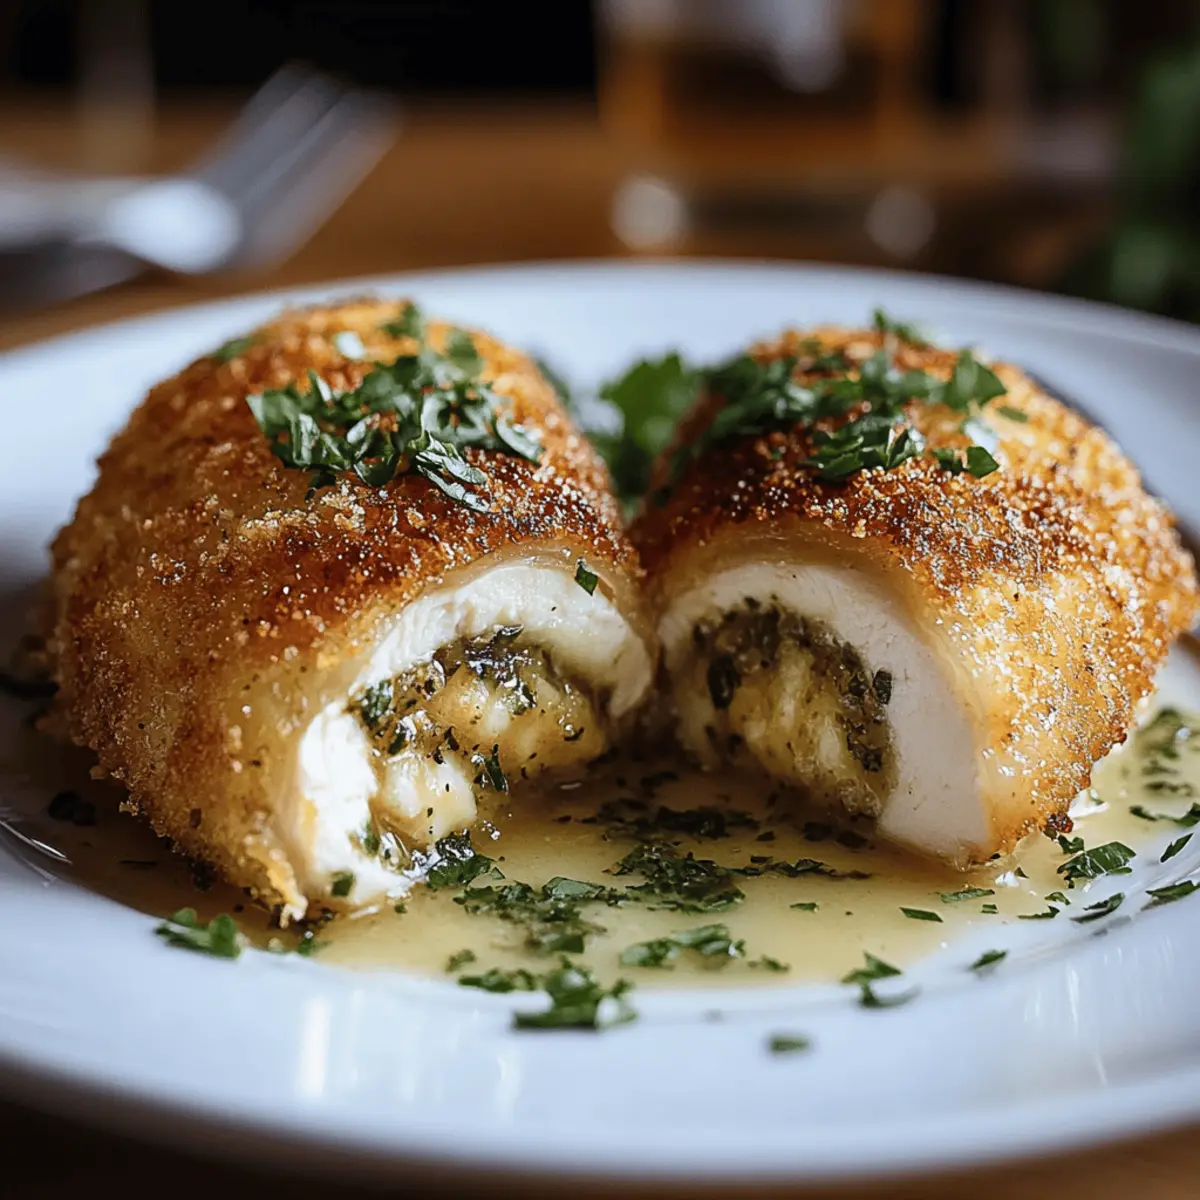
The sizzle of golden-brown Chicken Kiev with Garlic Butter Filling is a melody for the senses, inviting you into a cozy culinary world where comfort food reigns supreme. This recipe isn’t just a meal; it’s a delightful escape from the mundane, perfect for homemade dinners that deserve a bit of flair. With its crispy exterior encasing a luscious garlic and herb butter, this dish strikes the ideal balance between indulgence and family-friendly nourishment. Plus, it’s a fantastic way to impress your loved ones without spending hours in the kitchen! As I step into the realm of flavor and recipe magic, I can’t help but wonder: are you ready to take your cooking game to the next level?
Why Is Chicken Kiev So Irresistible?
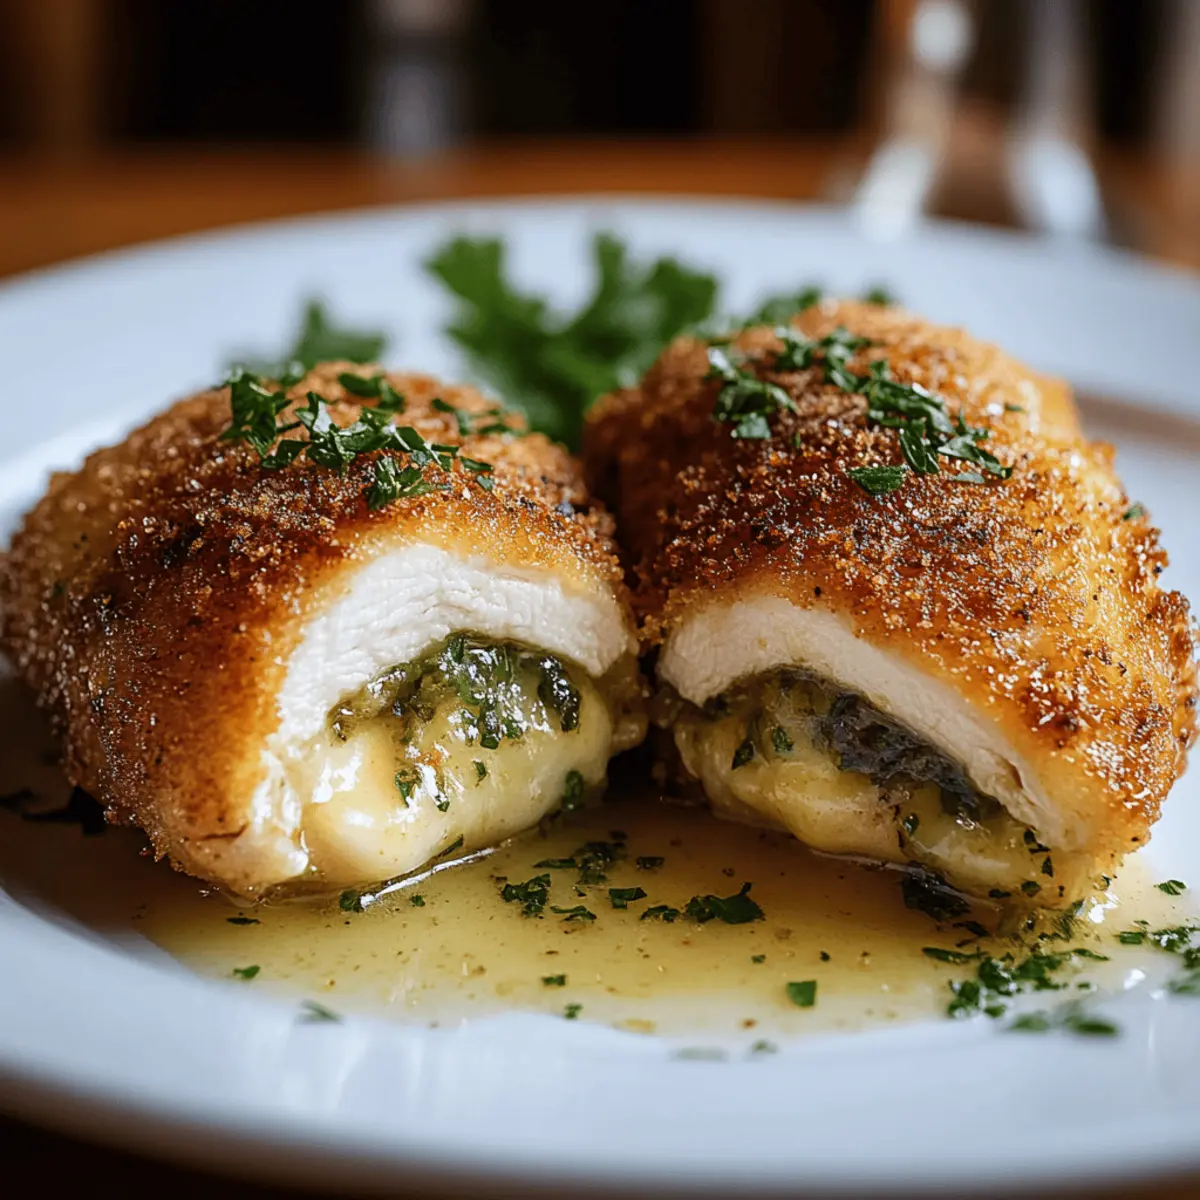
Decadent Garlic Butter: Each bite oozes with savory garlic-herb butter, creating an explosion of flavor that will have your taste buds dancing.
Crispy Perfection: The golden panko crust delivers an incredible crunch, perfectly contrasting the tender chicken within.
Impressive Yet Easy: This dish impresses guests without requiring extensive culinary skills, making you feel like a pro in the kitchen.
Versatile & Customizable: Easily adapt the filling with your favorite herbs or spices for a personalized touch.
Comfort Food Delight: A classic dish that brings warmth and joy to any dinner table, perfect for family gatherings or cozy nights in.
Dive into this delightful Chicken Kiev with Garlic Butter Filling adventure, and elevate your homemade meals with a touch of elegance!
Chicken Kiev with Garlic Butter Filling Ingredients
For the Garlic Butter
• Unsalted butter – gives a rich flavor; ensure it’s softened for easy mixing.
• Parsley – use fresh parsley for brighter flavor; it enhances the herbaceous notes.
• Garlic cloves – freshly minced brings a robust garlic taste, elevating the dish.
• Salt – adjust as needed if you have salted butter; this controls the flavor balance.
For the Chicken
• Chicken breasts – boneless and skinless options are best for a tender bite; ensure they're pounded evenly for consistent cooking.
• Salt – this is essential for seasoning the chicken and bringing out its natural flavors.
• Pepper – adds a hint of spice and depth to the chicken.
For the Coating
• Egg – lightly whisked, helps the breadcrumbs adhere for a crunchy coating.
• Flour – dusting the chicken in flour creates a barrier that locks in moisture.
• Panko breadcrumbs – these give an extra crunch and texture that’s characteristic of a perfect Chicken Kiev.
For Frying & Serving
• Oil for frying – choose a neutral oil with a high smoke point; this heat achieves the golden crunch.
• Chopped parsley – fresh garnish that adds a splash of color and freshness when serving.
This Chicken Kiev with Garlic Butter Filling is not just delicious; it’s a culinary experience waiting to unfold in your kitchen!
Step‑by‑Step Instructions for Chicken Kiev with Garlic Butter Filling
Step 1: Prepare the Garlic Butter
In a mixing bowl, combine 6 tablespoons of softened unsalted butter, 2 teaspoons of finely chopped parsley, 2 minced garlic cloves, and ¼ teaspoon salt until smooth. Shape this mixture into a rectangle about 10 x 6 cm on a sheet of parchment paper. Wrap tightly and refrigerate for at least 30 minutes until firm. Once ready, slice the butter into two batons for your Chicken Kiev with Garlic Butter Filling.
Step 2: Prepare the Chicken
Using a meat mallet, pound the 2 chicken breasts to an even thickness of about 0.5 cm. Season both sides generously with ½ teaspoon salt and ¼ teaspoon pepper for optimal flavor. Place one butter baton in the center of each chicken breast, then roll the chicken tightly, seam side down. Wrap each piece in cling wrap and freeze them for 30 minutes to maintain their shape while cooking.
Step 3: Set Up the Breading Station
Prepare your breading station by setting up three bowls: one with ¼ cup flour, another with 1 lightly whisked egg, and the last with 1 cup of panko breadcrumbs. Unwrap the chicken rolls from the cling wrap, then coat each in flour, dip into the egg, and finally press into the panko breadcrumbs, ensuring a thorough coating. Freeze them again for 30 minutes to help the breading adhere during frying.
Step 4: Fry and Bake the Chicken Kiev
In a heavy-bottomed pot, heat oil to 190°C (375°F). Carefully add the breaded chicken rolls, frying for 2 to 3 minutes until they turn golden brown on all sides. Using a slotted spoon, remove them from the oil and transfer to a baking sheet. Bake in a preheated oven at 180°C (350°F) for about 12 to 15 minutes, or until the internal temperature reaches 65°C (150°F) to ensure fully cooked chicken.
Step 5: Rest and Serve
Once baked, let the Chicken Kiev rest for at least 2 minutes on a serving plate. This allows the juices to settle and ensures each cut reveals the delicious garlic butter filling. Garnish with chopped parsley for a fresh, colorful touch. Slice into the crispy exterior to enjoy the melting garlic butter within. Serve with your favorite sides for a delightful homemade meal.

Chicken Kiev with Garlic Butter Filling Variations
Feel free to unleash your creativity and tailor this dish to your taste with these tempting twists!
-
Herb Swap: Substitute parsley with fresh dill, chives, or tarragon for a vibrant herbal kick. Each herb offers a unique flavor profile that brightens the dish.
-
Spicy Kick: Add red pepper flakes or a dash of cayenne to the garlic butter for a warm kick. This subtle heat elevates the classic recipe into something wonderfully bold.
-
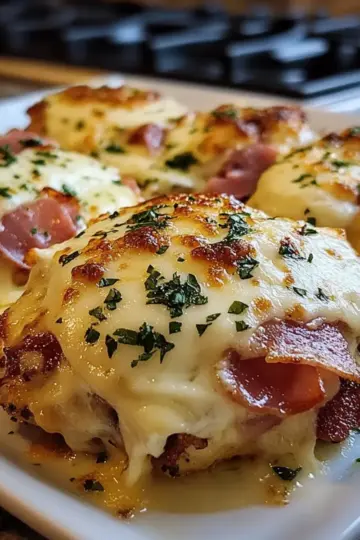
Cheesy Delight: Incorporate shredded cheese (like mozzarella or cheddar) into the garlic butter mixture for a rich, cheesy center. When you cut into the chicken, gooey cheese flows out, creating a delicious surprise!
-
Gluten-Free: Use crushed gluten-free crackers or almond flour instead of panko breadcrumbs to make a gluten-free version. This allows everyone to indulge without missing out on flavor or crunch.
-
Zesty Lemon: Mix in a touch of lemon zest to the garlic butter for a refreshing zing. The citrus brightness cuts through the richness beautifully, creating a harmonious balance.
-
Stuffed with Spinach: Add sautéed spinach or other greens to the garlic butter for added nutrients and a wonderful contrast in texture. This version is not only healthier but adds vibrant color too!
-
Baked Instead of Fried: Swap frying for baking! Lightly brush the breaded chicken with oil and bake until golden. It's a healthier take that still yields crispy goodness.
-
Smoky Flavor: Introduce smoked paprika to the garlic butter for a delightful smoky depth. This adds complexity and warmth, making each bite distinctly memorable.
Embrace the joy of cooking and personalize your Chicken Kiev with Garlic Butter Filling according to your culinary whims!
Make Ahead Options
These Chicken Kiev with Garlic Butter Filling are perfect for busy weeknights and meal prepping! You can make the garlic butter and shape it up to 24 hours in advance; simply refrigerate it until firm. The chicken can also be prepared and rolled with the butter, then wrapped tightly and frozen for up to 3 months. When ready to cook, just thaw in the fridge overnight before frying and baking. For best results, ensure the breaded Kiev are frozen again for 30 minutes before frying to maintain their shape and create that crispy texture. With these make-ahead options, you’ll have a quick and delicious dinner that’s just as satisfying as if you made it fresh!
What to Serve with Chicken Kiev with Garlic Butter Filling
The delightful crunch of golden-brown Chicken Kiev pairs beautifully with a variety of vibrant accompaniments to create a memorable meal experience.
-
Creamy Mashed Potatoes: These fluffy potatoes absorb the delicious garlic butter, making every bite an explosion of flavor and comfort.
-
Garlic Roasted Asparagus: The crisp-tender spears add brightness, and their subtle sweetness complements the richness of the Chicken Kiev perfectly.
-
Simple Green Salad: A refreshing mix of greens and a tangy vinaigrette cuts through the indulgence, bringing balance to your plate.
-
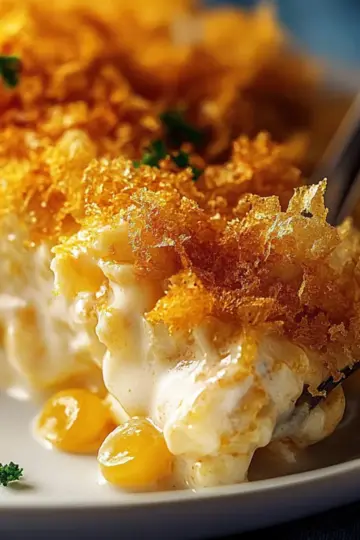
Cheesy Broccoli Casserole: Rich and creamy, this dish harmonizes with the buttery chicken while offering a delightful contrast in texture.
-
Classic Coleslaw: Crunchy and tangy, coleslaw provides a refreshing contrast that brightens the meal and stimulates the palate.
-
Baked Sweet Potatoes: Their natural sweetness pairs beautifully with the garlic butter filling and adds a nutritious touch to your meal.
-
Lemon Butter Pasta: The zesty sauce enhances the dish, bringing a splash of freshness that dances on your taste buds with every bite.
-
Sparkling White Wine: A crisp, chilled glass brings a celebratory flair, accentuating the savory notes of the Chicken Kiev and enhancing your dining experience.
-
Chocolate Lava Cake: To finish off, a warm, molten center dessert indulgently contrasts with the meal's savory elements—perfect for a sweet ending.
Tips for the Best Chicken Kiev
Butter Temperature: Make sure the butter is softened, not melted. This ensures it blends smoothly with herbs and maintains its shape when wrapped in chicken.
Chicken Thickness: Pound the chicken breasts evenly to about 0.5 cm thick. Uneven pieces can lead to inconsistent cooking, leaving some parts dry.
Coating Technique: Don’t rush the breading process. Coat thoroughly in flour, then egg, and finally panko breadcrumbs to achieve that perfect crispy crust for your Chicken Kiev with Garlic Butter Filling.
Chill Between Steps: Allowing the wrapped chicken to freeze between breading and frying helps the coating adhere, promoting a golden and crispy result during cooking.
Temperature Check: Use a meat thermometer to ensure the internal temperature reaches 65°C (150°F). Proper cooking guarantees juicy chicken and that delicious molten garlic butter filling.
How to Store and Freeze Chicken Kiev
Fridge: Refrigerate leftover Chicken Kiev in an airtight container for up to 3 days to keep it fresh and flavorful.
Freezer: Freeze uncooked Chicken Kiev before frying for up to 3 months. Ensure they're wrapped tightly in cling wrap to prevent freezer burn.
Reheating: To reheat cooked Chicken Kiev, bake at 180°C (350°F) for about 15 minutes or until heated through, ensuring the garlic butter filling remains oozy and delicious.
Thawing: If frozen, thaw Chicken Kiev in the refrigerator overnight before cooking. This ensures even cooking and a delightful experience with your garlic butter filling.
Chicken Kiev with Garlic Butter Filling Recipe FAQs
How do I choose the best chicken breasts for Chicken Kiev?
Absolutely! When selecting chicken breasts, look for boneless, skinless options that are plump and firm to the touch. Fresh chicken should have a pinkish hue and avoid any dark spots. Ensure they are free from any unpleasant odor, as this can indicate spoilage.
What’s the best way to store leftover Chicken Kiev?
You can refrigerate leftover Chicken Kiev in an airtight container for up to 3 days. Simply make sure it's tightly sealed to prevent any moisture loss, keeping it fresh and flavorful for your next meal.
Can I freeze Chicken Kiev?
Very much! You can freeze uncooked Chicken Kiev for up to 3 months. Just wrap each piece tightly in cling wrap to prevent freezer burn and place them in a resealable freezer bag. When you're ready to cook, thaw them in the refrigerator overnight for the best results.
What if my Chicken Kiev is soggy after frying?
If your Chicken Kiev turns out soggy, it might be due to not coating it well in breadcrumbs or frying at too low of a temperature. Make sure the oil is properly heated to 190°C (375°F) before frying. And don't rush the breading process; a thorough coating creates that extra crunch.
Can my pet enjoy Chicken Kiev?
While the chicken itself is safe for pets, Chicken Kiev features garlic and possibly too much salt, which can be harmful to animals. It's best to keep it as a human delicacy and prepare a simple, plain chicken option for your furry friends.
How do I ensure the garlic butter filling is perfectly gooey?
To achieve that delicious molten garlic butter filling, use softened but not melted butter mixed with herbs, and remember to freeze the chicken after sealing the butter inside. This allows the flavors to meld beautifully while ensuring the filling stays intact during cooking.

Irresistible Chicken Kiev with Garlic Butter Filling Recipe
Ingredients
Equipment
Method
- In a mixing bowl, combine the garlic butter ingredients until smooth, shape into a rectangle on parchment, wrap, and refrigerate for at least 30 minutes.
- Pound the chicken breasts to an even thickness, season, place butter, roll tightly, wrap in cling wrap, and freeze for 30 minutes.
- Set up a breading station and coat the chicken, freeze again for 30 minutes.
- Heat oil in a pot, fry chicken until golden, then bake until cooked through.
- Let rest before serving, garnish with parsley, and enjoy.


Leave a Reply