
There’s something magical about transforming leftover tortillas into a vibrant dish like crispy migas. Each crunchy bite takes me back to cozy brunches with friends, where laughter spills over bowls of colorful food. This recipe marries savory ingredients with the comforting texture of eggs, offering both a quick prep time and crowd-pleasing flavors that are hard to resist. Packed with fresh veggies and your choice of spicy kick, these crispy migas can elevate any meal from ordinary to extraordinary. Curious how to whip up this delightful dish in just 25 minutes? Let’s get cooking!
Why are Crispy Migas So Irresistible?
Bold flavors: The combination of spices, cheese, and fresh ingredients creates a fiesta of taste in every bite.
Quick prep: With just 25 minutes from start to finish, you’ll enjoy a delicious homemade meal in no time.
Perfect for meal prep: Make extra to enjoy throughout the week—great for breakfast or a snack!
Versatile toppings: Personalize your migas with avocado, sour cream, or your favorite hot sauce for that extra flair.
Family favorite: This dish is sure to please everyone at the table, making it perfect for brunch gatherings or casual dinners!
Crispy Migas Ingredients
For the Base
• Day-old corn tortillas – Using stale tortillas adds the perfect crunch and texture that makes crispy migas stand out.
• Large eggs – Lightly beaten to bind the ingredients and create a fluffy, satisfying filling.
For the Flavor
• Onion – Finely chopped to give a subtle sweetness and depth to the dish.
• Jalapeño or green chili – Diced for a spicy kick; adjust to your heat preference!
• Garlic – Minced to infuse a fragrant aroma that elevates the overall flavor profile.
For the Mix
• Cheddar or Monterey Jack cheese – Shredded for melty goodness; feel free to mix cheeses for fun flavor combinations.
• Cilantro – Freshly chopped to add a burst of freshness that brightens every bite.
• Tomato – Diced to provide juicy texture and complement the creaminess of the eggs.
Seasoning & Serving
• Salt – To taste, enhancing all the delicious flavors.
• Freshly ground black pepper – Adds warmth and an extra layer of flavor.
• Avocado slices – For serving, bringing creamy richness that pairs beautifully with crispy migas.
• Sour cream or crema – Another serving option; it adds a delightful creaminess and tanginess.
• Hot sauce – For serving, offering an opportunity to customize heat levels and spice it up just how you like!
With these simple yet vibrant ingredients, you’ll be creating flavorful crispy migas that will impress everyone at the table!
Step‑by‑Step Instructions for Crispy Migas
Step 1: Preheat the Skillet
Begin by preheating a large non-stick skillet over medium heat. Add 2 tablespoons of oil, swirling it around until it shimmers, indicating it’s hot enough. This foundational step is crucial for achieving that crispy texture in your migas, so let it heat for about 2 minutes before moving on.
Step 2: Sauté the Tortillas
Once the oil is ready, toss in the torn pieces of day-old corn tortillas. Stir them frequently for about 4 minutes, until the edges are golden brown and slightly crispy. You'll want to keep an eye on them, as they should start to crisp up nicely, creating the perfect base for your crispy migas.
Step 3: Cook the Vegetables
After the tortillas are crispy, push them to one side of the skillet. In the cleared space, add the finely chopped onion, diced jalapeño, and minced garlic. Sauté these veggies for approximately 2–3 minutes, stirring occasionally, until they soften and release their delicious aromas, adding flavor to your migas.
Step 4: Add the Eggs
Pour the lightly beaten eggs into the skillet, gently folding them into the tortilla and veggie mix. Allow the eggs to cook for 3–4 minutes, stirring occasionally, until they begin to set but remain slightly moist. This will create a fluffy texture that beautifully complements the crispy tortillas in your migas.
Step 5: Melt the Cheese
Sprinkle the shredded cheddar or Monterey Jack cheese evenly over the migas mixture. Then, cover the skillet off heat and let it rest for about 2 minutes. This resting time allows the cheese to melt perfectly, creating a creamy layer that binds all the flavors of your crispy migas together.
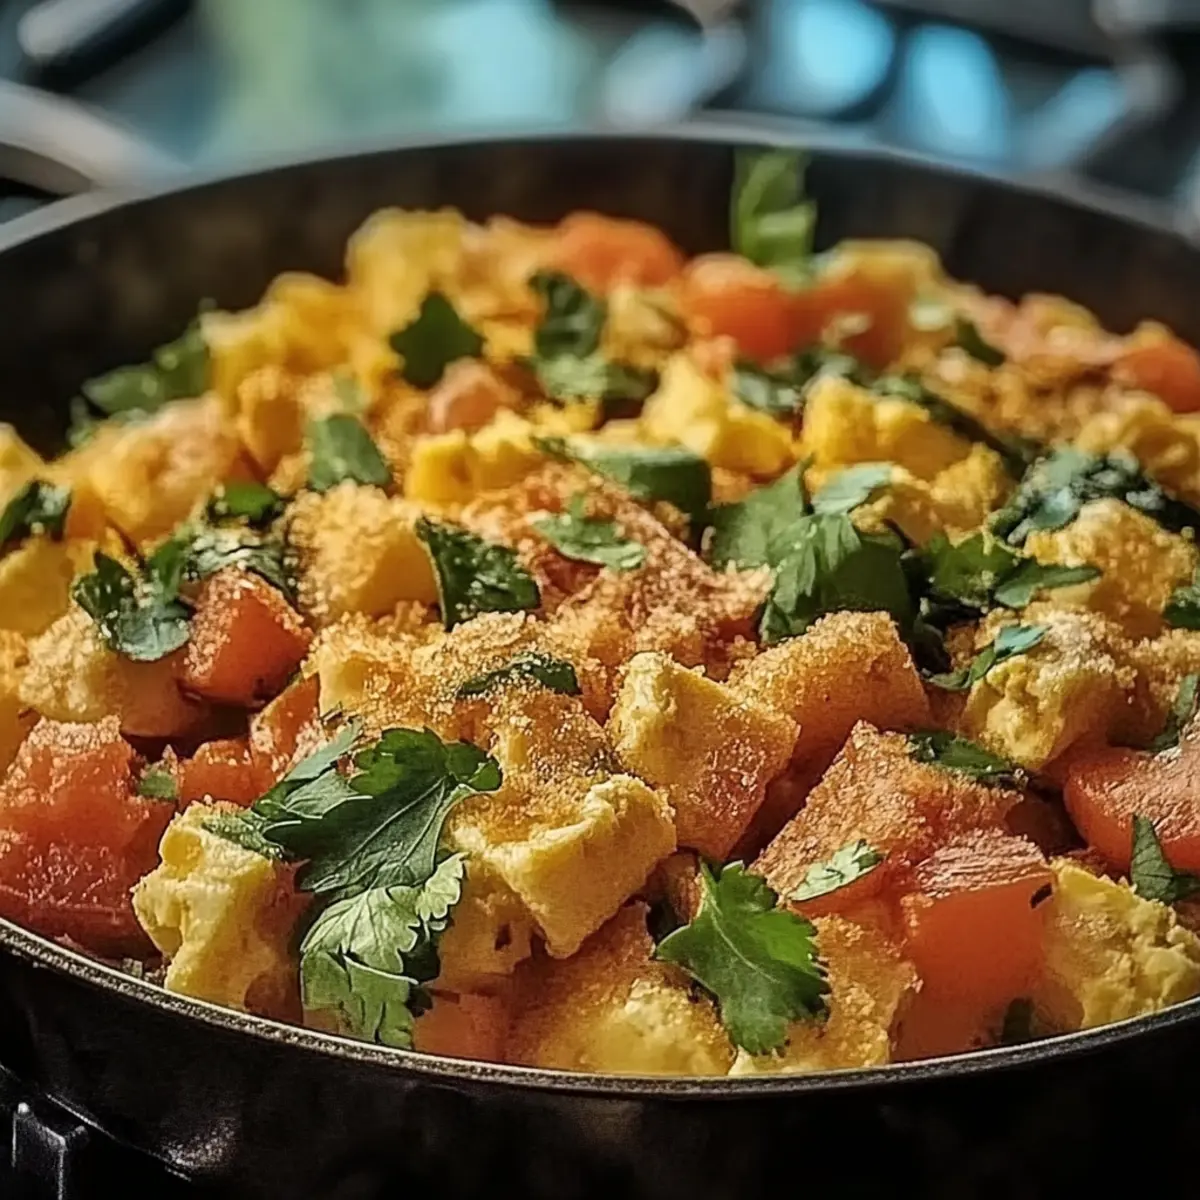
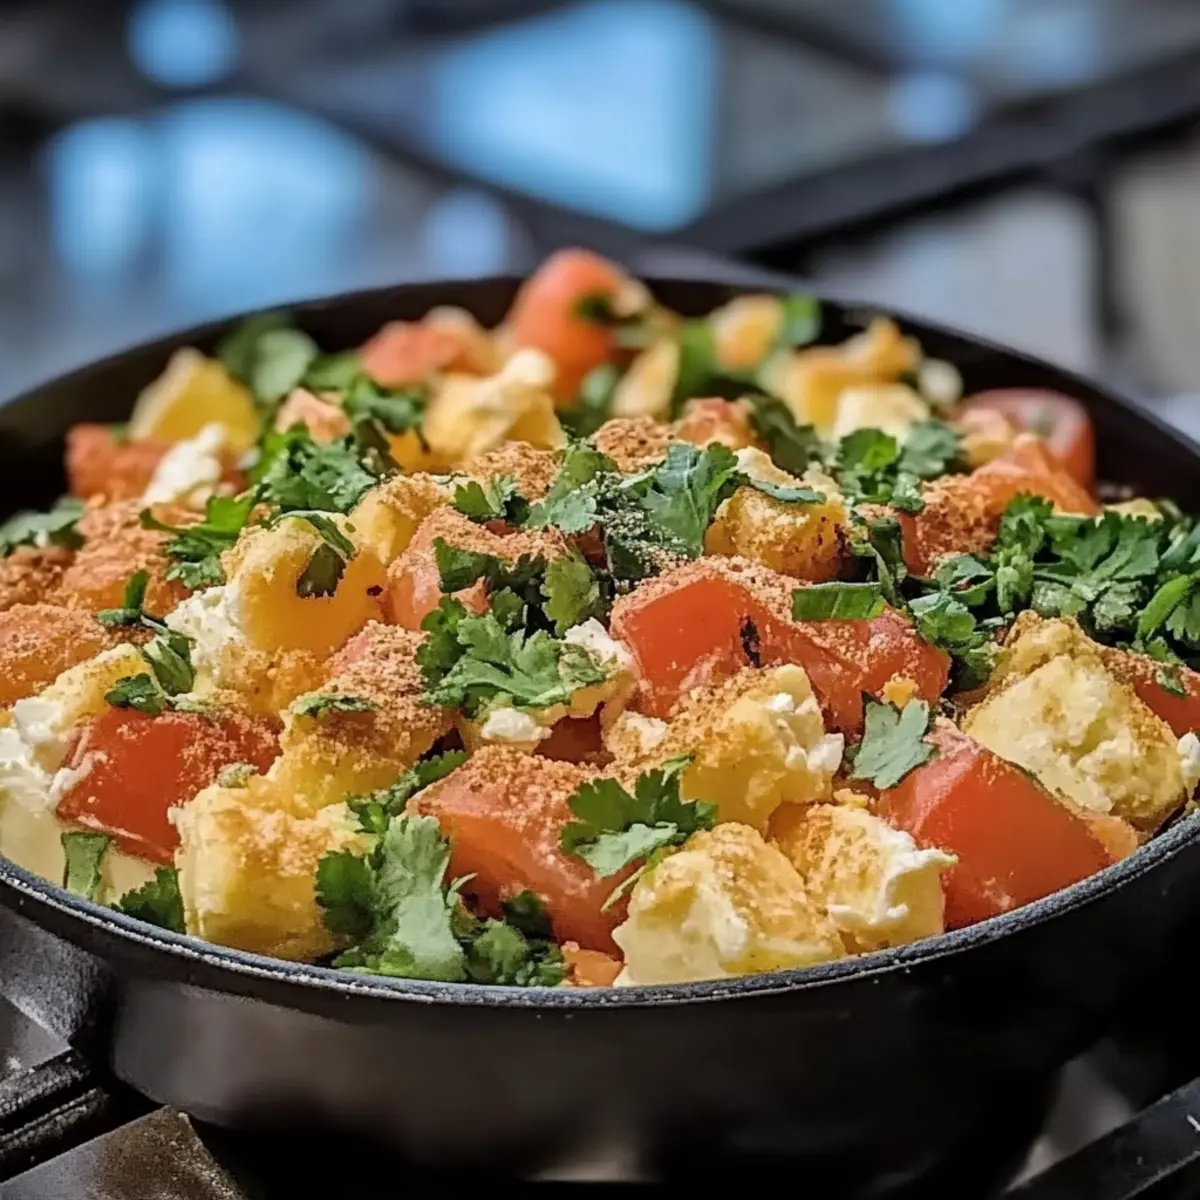
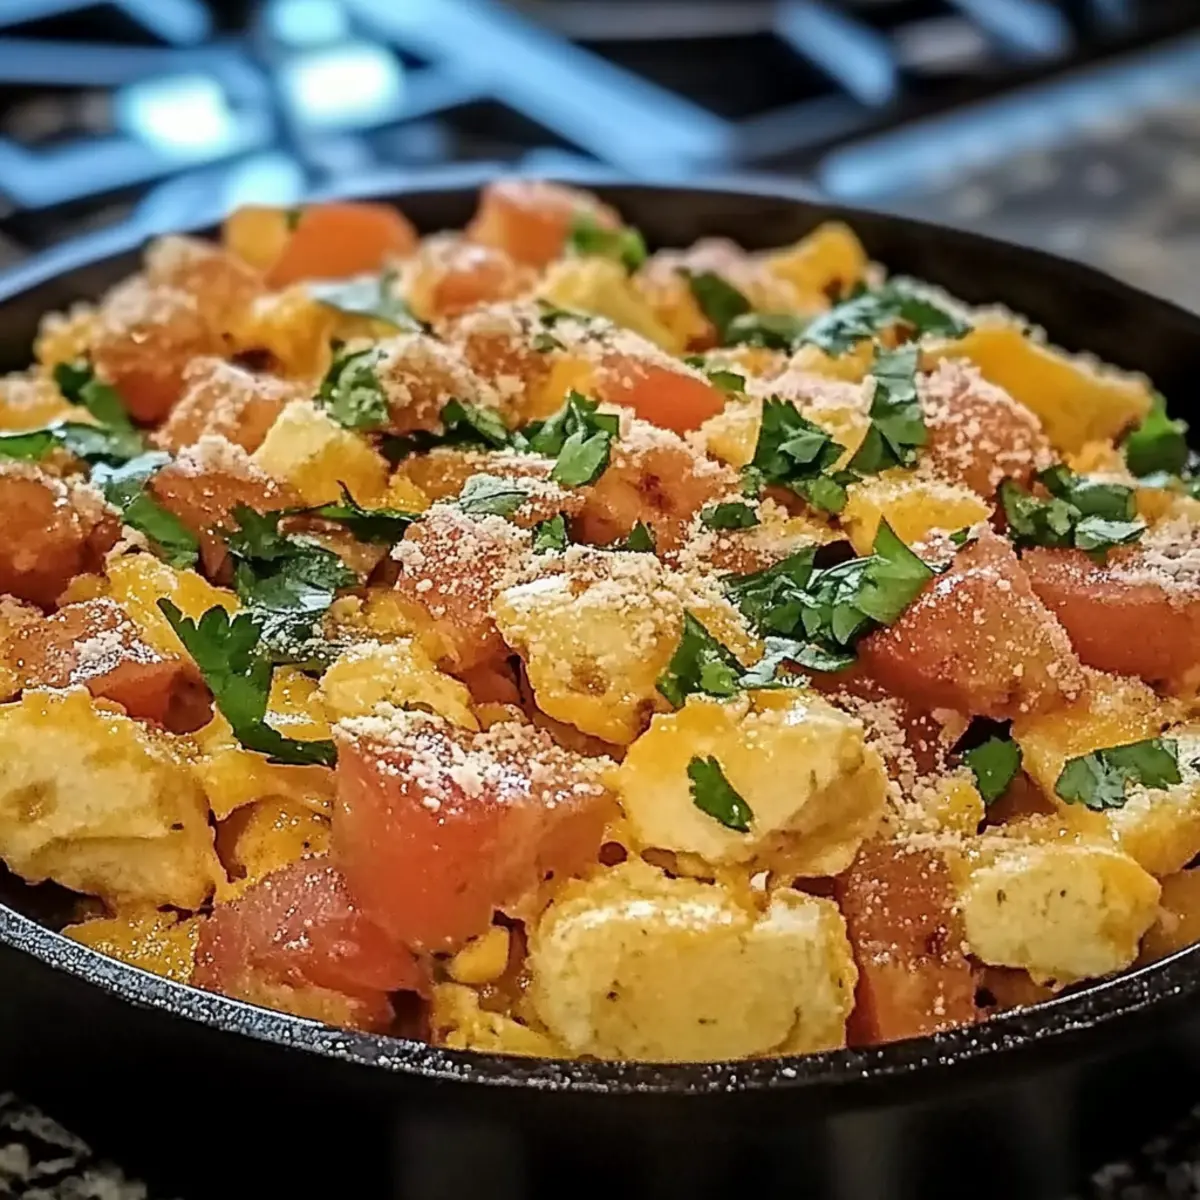
Step 6: Finish with Fresh Ingredients
To elevate your crispy migas, fold in the freshly chopped cilantro and diced tomato. This final touch adds brightness and freshness to the dish. Serve with delicious avocado slices, a dollop of sour cream or crema, and a dash of hot sauce, enhancing the flavor experience further before enjoying your meal!

Variations & Substitutions of Crispy Migas
Feel free to explore these exciting twists to make your crispy migas even more delectable!
- Gluten-Free: Substitute corn tortillas with gluten-free tortillas, ensuring everyone can savor this dish.
- Vegan: Replace eggs with tofu scramble mixed with turmeric for color and flavor; use nutritional yeast for a cheesy note.
- Spicy Upgrade: Add crushed red pepper flakes or diced habanero for an extra heat boost if you crave spiciness.
- Cheese Swap: Try feta or goat cheese instead of cheddar for tangy, crumbled richness that complements the freshness of cilantro.
- Baked Version: Spread the mixture in a baking dish and bake at 375°F for 15-20 minutes for a fun hands-off twist!
- Sausage Variation: Incorporate cooked chorizo or breakfast sausage to introduce meaty savory notes that pair wonderfully with eggs.
- Vegetable Boost: Toss in other veggies like bell peppers, spinach, or zucchini to add colorful textures and additional nutrients.
- Herbal Exploration: Substitute cilantro with fresh parsley or basil to experiment with different aromatic profiles and bright flavors.
No matter the modification, your crispy migas will surely remain a heartwarming delight!
What to Serve with Crispy Migas?
Indulging in crispy migas is just the beginning of a delicious meal spread, inviting endless possibilities to enhance your dining experience.
-
Fresh Fruit Salad: A vibrant mix of seasonal fruits provides a refreshing contrast to the savory migas, balancing the meal beautifully.
-
Spicy Black Beans: The rich, earthy flavor and creamy texture of black beans are a perfect complement to hearty migas. They add protein and depth, making it a more filling dish.
-
Savory Chorizo: Adding cooked chorizo brings a punch of spice and smokiness that's a match made in heaven with the cheese and eggs in your migas.
-
Crispy Potato Hash: Crunchy potatos offer a delightful texture, elevating your breakfast to a leisurely brunch experience that everyone will love.
-
Breakfast Twist on Guacamole: Creamy avocado mashed with lime and cilantro can serve as a zesty dip or topping, enhancing each bite of your crispy migas.
-
Light Garden Salad: A simple salad with mixed greens, tomatoes, and a light vinaigrette adds a burst of freshness, balancing the richness of the migas.
-
Cold Brew Coffee: Pairing your meal with a cold brew will give a refreshing caffeine boost, making it an invigorating breakfast experience.
-
Margarita or Michelada: For a festive touch, a light margarita or beer cocktail offers a wonderful way to unwind while savoring those crispy migas on a sunny weekend.
Expert Tips for Crispy Migas
Use Stale Tortillas: Ensure your corn tortillas are day-old for optimal crunch; fresh ones can turn mushy during cooking.
Cook Eggs Gently: Avoid overcooking the eggs; they should be fluffy and slightly moist for the perfect texture in your crispy migas.
Customize Spice Level: Adjust the amount of jalapeño or green chili according to your heat preference, allowing everyone to enjoy the dish comfortably.
Don’t Overcrowd Pan: If needed, cook in batches to maintain the crispiness of the tortillas; a crowded pan can lead to steaming instead of crisping.
Top to Taste: Personalize your migas with avocado, sour cream, or your favorite hot sauce—these toppings add a delightful finish and extra layers of flavor!
How to Store and Freeze Crispy Migas
Fridge: Store leftover crispy migas in an airtight container for up to 3 days. This keeps the dish fresh and ready for a quick reheat.
Freezer: For longer storage, freeze crispy migas in a freezer-safe container for up to 2 months. To reheat, thaw overnight in the fridge and warm up in the skillet.
Reheating: When reheating, use a non-stick skillet over medium heat, adding a splash of oil to retain the crispy texture. Heat until warmed through, about 5–7 minutes.
Avoid the Microwave: Microwaving can make the migas soggy; opt for the skillet method instead to preserve their delicious crunch!
Make Ahead Options
Crispy migas are perfect for busy weekdays, allowing you to save time while still enjoying a delicious homemade meal! You can prep the torn corn tortillas, chopped onion, diced jalapeño, and minced garlic up to 24 hours in advance. Store them in airtight containers in the refrigerator to keep everything fresh. When you're ready to enjoy your crispy migas, simply follow the cooking instructions—toss the prepped ingredients into the skillet and add the beaten eggs right before serving. The result will be just as flavorful and satisfying, giving you breakfast satisfaction with minimal effort during the week!
Crispy Migas Recipe FAQs
How do I choose the best corn tortillas for crispy migas?
Absolutely! Look for day-old corn tortillas as they deliver that perfect crunch. Fresh tortillas tend to become too soft and mushy under heat, transforming your migas into a soggy mess. If you don't have day-old tortillas, let fresh ones sit out for a little while to dry out before using them.
How should I store leftover crispy migas?
To store, place leftover crispy migas in an airtight container in the fridge for up to 3 days. If you prefer to save them for longer, you can freeze them! Just make sure they're cooled completely, then transfer to a freezer-safe container for up to 2 months. This method allows you to enjoy the flavors of crispy migas anytime!
Can I freeze crispy migas? What’s the best way to reheat them?
Yes, you can freeze crispy migas! First, let them cool completely. Then, pack them in a freezer-safe container or heavy-duty freezer bag. When you're ready to enjoy them, thaw overnight in the fridge. For reheating, use a non-stick skillet over medium heat, adding a splash of oil to maintain the crunch for about 5–7 minutes. This technique helps prevent sogginess, ensuring every bite remains delightful!
What should I do if my migas turn out soggy?
Very! If your migas turn out soggy, it's likely due to two potential issues: using fresh tortillas or overcrowding the pan while cooking. For the best results, always use day-old tortillas and, if necessary, cook in batches to give each piece room to crisp up. Additionally, try cooking on medium heat and avoid adding too much moisture during cooking to retain that satisfying crunch.
How spicy can I make my crispy migas?
You have full control over the heat level! For a milder flavor, use just a small amount of jalapeño or substitute it with bell peppers. Want more spice? Feel free to add an extra chili or drizzle in some hot sauce before serving! It’s all about personal taste, so experiment with what you love to find your perfect balance.
Are crispy migas suitable for vegetarians?
Absolutely! This recipe is a fantastic vegetarian option, loaded with eggs, veggies, and cheese. If you're looking to make it vegan-friendly, you could substitute the eggs with an appropriate plant-based alternative (like scrambled tofu), and replace cheese with a vegan option. Toppings are versatile too, so add whatever you like!
Crispy Migas: A Flavor-Packed Breakfast Surprise
Ingredients
Equipment
Method
- Preheat a large non-stick skillet over medium heat. Add 2 tablespoons of oil, swirling it around until it shimmers. Let it heat for about 2 minutes.
- Toss in torn pieces of day-old corn tortillas. Stir frequently for about 4 minutes until golden brown.
- Push tortillas to one side and add onion, jalapeño, and garlic, sautéing for about 2-3 minutes.
- Pour the beaten eggs into the skillet, folding them into the mixture, and cook for 3-4 minutes until slightly moist.
- Sprinkle cheese over the mixture, cover off heat, and let rest for about 2 minutes for the cheese to melt.
- Fold in cilantro and tomato, and serve with avocado slices, sour cream, and hot sauce.


Leave a Reply