
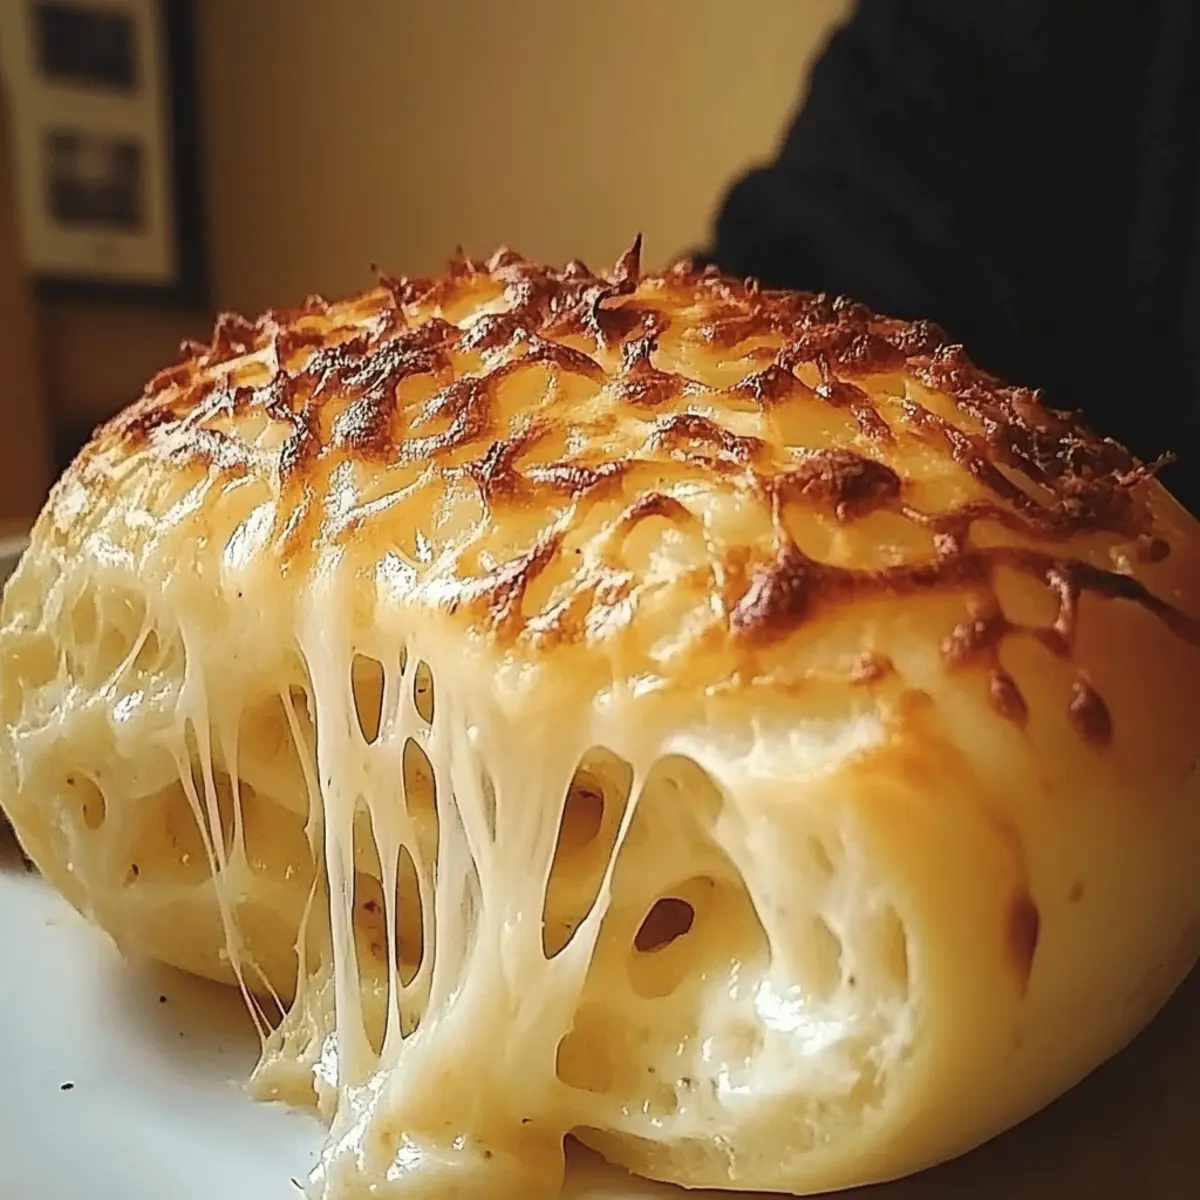
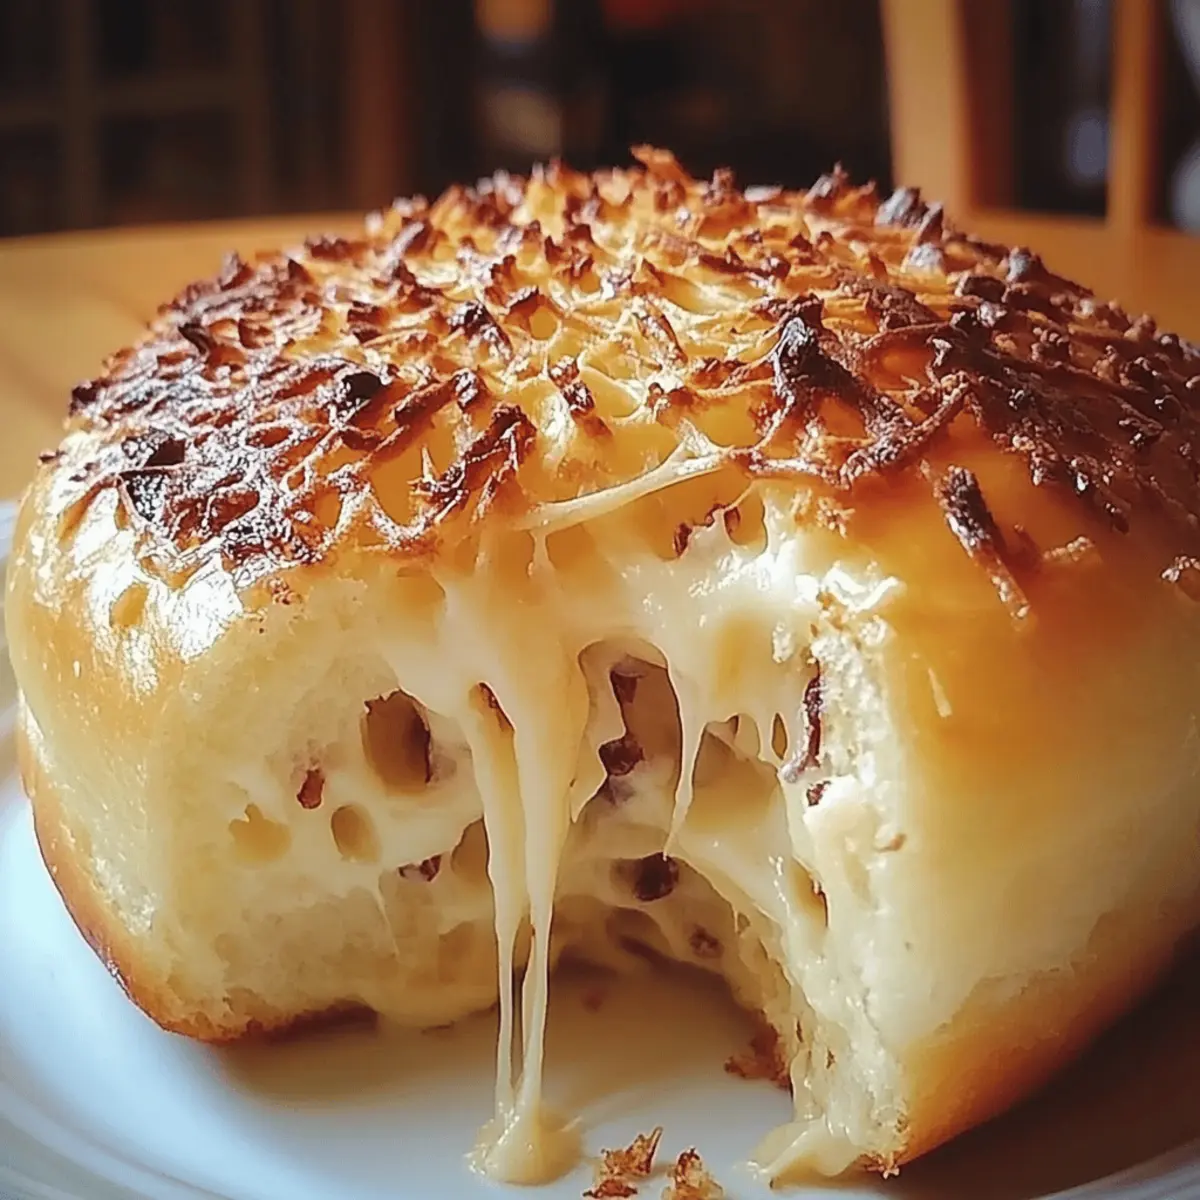
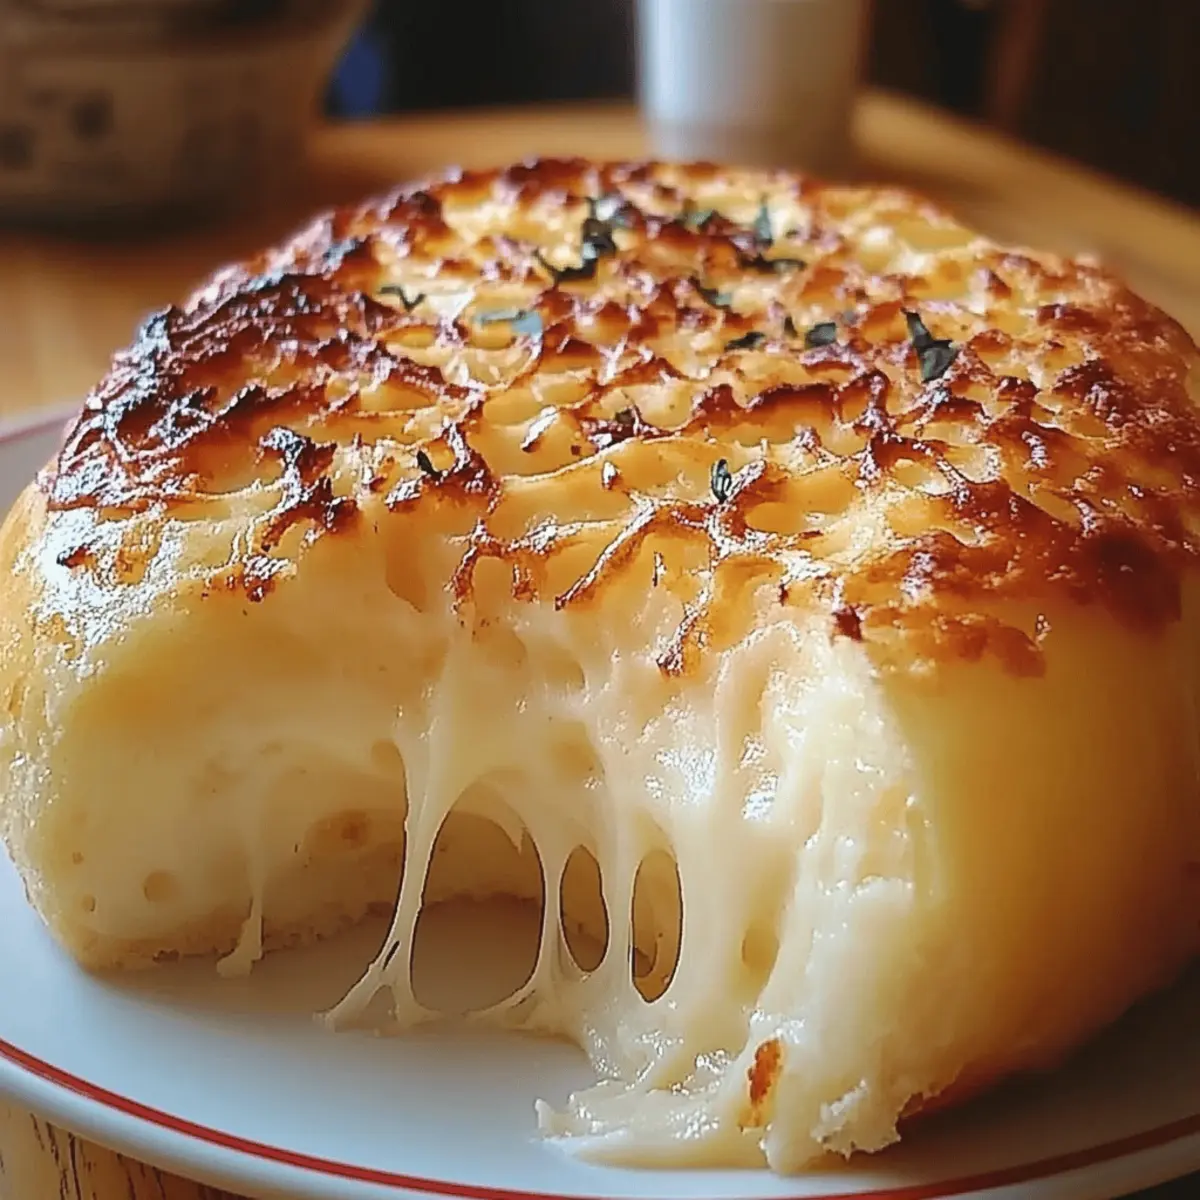
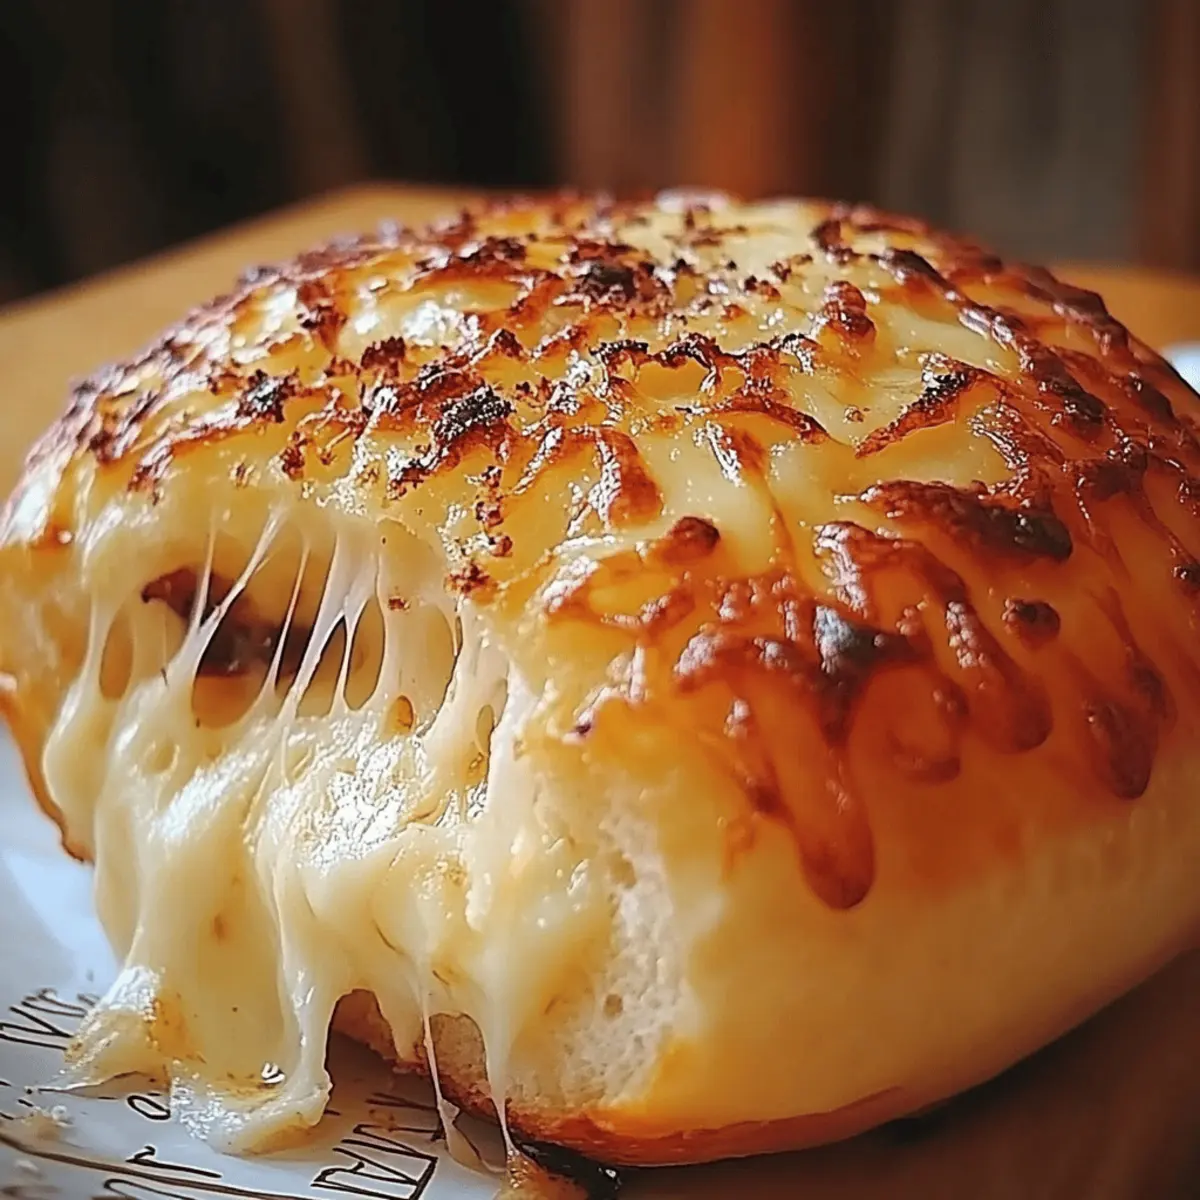
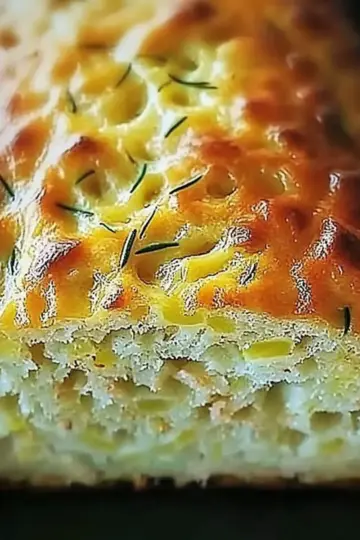
There’s a certain magic that happens when you combine dough, warmth, and cheese. As I knead the ingredients for my Cheesy Ensaymada, I can feel the anticipation in the air. This Filipino classic is more than just a pastry; it’s an experience that brings loved ones together, perfect for lazy weekend breakfasts or cozy afternoon snacks. What makes this recipe truly special is its quick prep time and the delightful twist of melted cheese on top, making it a crowd-pleaser that your friends and family will rave about. From the moment the aroma wafts through your kitchen to the first gooey bite, you're bound to fall in love with this indulgent treat. Are you ready to create your own batch of cheesy bliss?
Why is Cheesy Ensaymada a Must-Try?
Irresistible Comfort: The moment you take a bite, you’ll be enveloped in warm, cheesy goodness that brings comfort and joy.
Quick Preparation: With just 10 minutes of hands-on time, you won’t be tied to the kitchen for long.
Crowd-Pleasing Delight: Whether for breakfast or snack, everyone will adore these fluffy, cheesy spirals that disappear in seconds.
Versatile Base: Feel free to experiment with different cheeses or fillings to make it uniquely yours!
Homemade Goodness: There’s nothing better than freshly baked pastries that fill your home with delightful aromas, making you feel like a baking pro.
Cheesy Ensaymada Ingredients
For the Dough
- All-purpose flour – 3 cups provide the perfect structure for delightful fluffiness.
- Granulated sugar – ¼ cup balances the flavors and helps with browning.
- Instant yeast – 1 packet (2 ¼ tsp) works quickly to create that irresistible rise.
- Salt – ½ teaspoon enhances the overall flavor profile of your cheesy ensaymada.
- Warm milk – ½ cup activates the yeast and adds moisture to the dough.
- Unsalted butter – ¼ cup melted contributes richness to the dough.
- Large eggs – 2 add moisture and a tender crumb to your ensaymada.
- Vanilla extract – 1 teaspoon introduces a hint of warmth that complements the cheese beautifully.
For the Topping
- Unsalted butter – 3 tablespoon melted gives the pastry a shiny, attractive finish.
- Granulated sugar – ¼ cup to sprinkle on top, adding a delightful sweetness.
- Grated cheddar cheese – ½ cup for a bold flavor, or substitute mozzarella for a milder touch.
This delightful combination of ingredients ensures that your Cheesy Ensaymada is not just another pastry—it's an experience that brings warmth and love to every bite.
Step‑by‑Step Instructions for Cheesy Ensaymada
Step 1: Prepare the Dough
In a large bowl, combine 3 cups of all-purpose flour, ¼ cup granulated sugar, 1 packet (2 ¼ tsp) instant yeast, and ½ teaspoon salt. Pour in ½ cup of warm milk, ¼ cup melted unsalted butter, 2 large eggs, and 1 teaspoon vanilla extract. Mix until a dough forms, then knead for 8–10 minutes on a floured surface until the dough is smooth and elastic. Cover the bowl with a cloth and let it rise in a warm spot for about 1 hour, or until it has doubled in size.
Step 2: Shape the Pastries
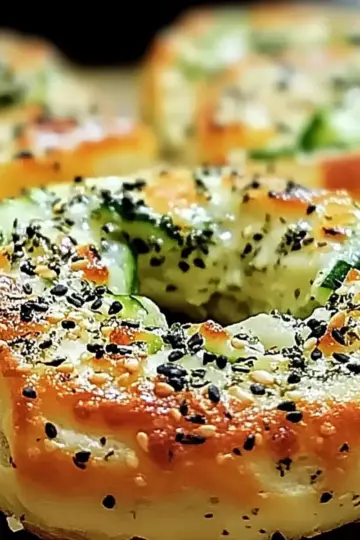
Once the dough has risen, punch it down gently before dividing it into 8–10 equal portions. Take each portion and roll it into a long log shape, then coil it into a spiral, ensuring the edges are tucked well. Position each coiled pastry on a greased or lined baking sheet, giving them enough space to rise. Cover them loosely and let the shaped pastries rise for another 20–30 minutes, or until they become slightly puffy.
Step 3: Preheat the Oven
While the pastries are rising, preheat your oven to 350°F (175°C). This will ensure that the oven reaches the perfect temperature for baking your Cheesy Ensaymada. Once the dough has puffed up nicely, it’s time to bake.
Step 4: Bake the Pastries
Carefully place the baking sheet in the preheated oven and bake the pastries for 15–18 minutes. Keep an eye on them; they should turn a lovely light golden brown. The warm aroma will fill your kitchen, beckoning you to enjoy these delightful treats.
Step 5: Add Toppings
Once baked, remove the pastries from the oven and immediately brush them generously with 3 tablespoon of melted butter while still warm. Next, sprinkle ¼ cup of granulated sugar evenly over them, followed by ½ cup of grated cheddar cheese, ensuring they are well-covered. The cheese will melt slightly, creating that irresistible cheesy goodness on top of your Cheesy Ensaymada.
Step 6: Serve and Enjoy
Allow the pastries to cool for a few minutes before serving. They can be enjoyed warm or at room temperature, making them perfect for any occasion. Indulge in the delicious flavors and comforting texture of your homemade Cheesy Ensaymada, and savor every gooey, cheesy bite!
Make Ahead Options
These Cheesy Ensaymada are perfect for busy home cooks looking to save time without sacrificing quality! You can prepare the dough and shape the pastries up to 24 hours in advance. Simply follow steps 1 and 2, then tightly cover the baking sheet with plastic wrap and refrigerate. When you're ready to bake, let the shaped pastries rise for 20 to 30 minutes at room temperature before preheating your oven. This method ensures that your Cheesy Ensaymada remains fluffy and delicious. For an even quicker option, the unbaked shaped pastries can also be frozen for up to 3 months; just allow them to thaw overnight in the refrigerator before baking. Enjoy your homemade treats with more ease and less fuss!
Expert Tips for Cheesy Ensaymada
Kneading Technique: Make sure to knead the dough thoroughly for 8–10 minutes until it's smooth and elastic, ensuring a soft texture.
Proper Rising: Let the dough rise in a warm area; a cold environment can prevent it from doubling in size, leading to dense pastries.
Coiling Consistency: When shaping the ensaymada into spirals, keep the coils even in size for uniform baking—this also enhances their charming appearance.
Topping Timing: Brush the pastries with melted butter right out of the oven for a shiny finish; this allows the sugar and cheese to adhere beautifully.
Experiment with Cheese: Feel free to try different cheeses or even add fillings like chocolate or guava to create your unique take on the classic Cheesy Ensaymada.
Cheesy Ensaymada Variations & Substitutions
Feel free to get creative with your Cheesy Ensaymada, transforming each bite into a unique delight that's all your own!
-
Gluten-Free: Substitute all-purpose flour with a 1:1 gluten-free flour blend for a safe option that still delivers on taste.
-
Vegan: Use plant-based milk, dairy-free butter, and flax eggs (1 tablespoon ground flaxseed + 3 tablespoon water for each egg) for a compassionate twist. Your ensaymada will be just as fluffy and delightful!
-
Spicy Twist: Add a pinch of cayenne or red pepper flakes to the dough for a subtle heat that elevates the cheesy flavor profile. It's a surprise party for your taste buds!
-
Sweet Flavors: Mix in ¼ cup of sweetened cocoa powder or chocolate chips to the dough, creating a delightful dessert version that's hard to resist. Indulgence just got sweeter!
-
Herb-Infused: Toss in fresh herbs like rosemary or thyme into the dough to infuse a fragrant, savory aroma and elevate the flavor profile beautifully. A touch of garden freshness can go a long way!
-
Cheese Variety: Experiment with a blend of cheeses like gouda, pepper jack, or a sharp parmesan for a rich, layered flavor that transforms every bite. The possibilities are as endless as your imagination!
-
Nutty Addition: Incorporate chopped nuts like walnuts, almonds, or pecans into the dough for an added crunch that contrasts wonderfully with the soft, cheesy interior. It’s a delightful texture combination!
-
Choco-Cheesy Combination: Swirl in nutella or chocolate spread before coiling the dough for an incredible sweet and savory experience. This decadent twist will have everyone asking for more!
How to Store and Freeze Cheesy Ensaymada
Room Temperature: Store your Cheesy Ensaymada in an airtight container for up to 3 days to keep them fresh and soft.
Fridge: If you need them to last longer, refrigerate in an airtight container for up to a week; just remember to reheat before serving for that fresh taste!
Freezer: Freeze the pastries unbaked or baked for up to 3 months. Wrap each pastry tightly in plastic wrap and then in aluminum foil for optimal freshness.
Reheating: When ready to enjoy, simply reheat thawed Cheesy Ensaymada in a preheated oven at 350°F (175°C) for about 10-15 minutes until warm and gooey again.
What to Serve with Cheesy Ensaymada
Imagine a cozy gathering where the rich aroma of freshly baked pastries blends with delightful side dishes, making mealtime feel special.
-
Fresh Fruit Salad: A vibrant mix of seasonal fruits adds a refreshing contrast to the rich, cheesy flavors of the ensaymada.
-
Savory Sautéed Greens: Lightly sautéed spinach or kale can complement the sweetness of the pastry while adding a nutritious crunch to your meal.
-
Herbed Cream Cheese Spread: A fluffy herbed cream cheese brings a tangy note that pairs beautifully with the cheesy ensaymada, making each bite more indulgent.
-
Tomato Basil Soup: The warmth and acidity of this classic soup balance the richness of the pastry, creating a comforting combination perfect for any afternoon snack.
-
Iced Tea with Lemon: A refreshing cup of iced tea cuts through the richness and rejuvenates your palette, making it an excellent drink to enjoy with cheesy ensaymada.
-
Dessert Option: Try pairing it with a light vanilla pudding or flan; their creaminess perfectly contrasts with the fluffy, cheesy texture of the ensaymada.
These pairing ideas will elevate your experience, bringing warmth and happiness to every bite of your delightful Cheesy Ensaymada.
Cheesy Ensaymada Recipe FAQs
What type of cheese is best for Cheesy Ensaymada?
Absolutely! You can use grated cheddar for a bold, robust flavor that stands out. If you prefer a milder taste, mozzarella is a great alternative that still melts beautifully. Feel free to mix cheeses too for a delightful twist!
How do I know if my dough has risen enough?
Look for the dough to double in size, which usually takes about 1 hour. You’ll know it’s ready when you lightly poke it with your finger, and the indentation should remain without bouncing back.
Can I freeze Cheesy Ensaymada?
Yes, very! To freeze, wrap each pastry tightly in plastic wrap, then in aluminum foil, and store in the freezer for up to 3 months. When you're ready to enjoy them, let them thaw in the fridge overnight and reheat in a preheated oven at 350°F (175°C) for about 10-15 minutes.
What should I do if my dough isn’t rising?
If your dough isn’t rising well, it could be due to the temperature, either being too cold or the yeast could be expired. To troubleshoot, find a warm spot in your kitchen or use a proofing box. If the yeast is expired, you'll need to start with fresh yeast. Give it time; the dough should rise!
How do I store leftover Cheesy Ensaymada?
To keep your Cheesy Ensaymada fresh, store them in an airtight container at room temperature for up to 3 days. For longer storage, keep them in the refrigerator for about a week, just remember to reheat them before serving to regain that soft, warm goodness!
Can I use all-purpose flour instead of bread flour?
Absolutely! All-purpose flour works wonderfully in this recipe and will create soft, fluffy pastries. If you want an even chewier texture, you can mix some bread flour in, but it’s not necessary. Enjoy experimenting!
Indulge in Cheesy Ensaymada: The Cozy Treat You’ll Love
Ingredients
Equipment
Method
- Prepare the Dough: In a large bowl, combine flour, sugar, yeast, salt. Pour in warm milk, melted butter, eggs, and vanilla extract. Mix until a dough forms, then knead for 8–10 minutes until smooth. Cover and let rise for 1 hour.
- Shape the Pastries: Punch down the dough, divide into 8–10 portions, roll into logs, and coil into spirals. Place on a baking sheet and let rise for another 20–30 minutes.
- Preheat the Oven: While rising, preheat to 350°F (175°C).
- Bake the Pastries: Bake for 15–18 minutes until golden brown.
- Add Toppings: Brush with melted butter, sprinkle with granulated sugar and cheese while still warm.
- Serve and Enjoy: Allow to cool slightly before serving.

Leave a Reply