
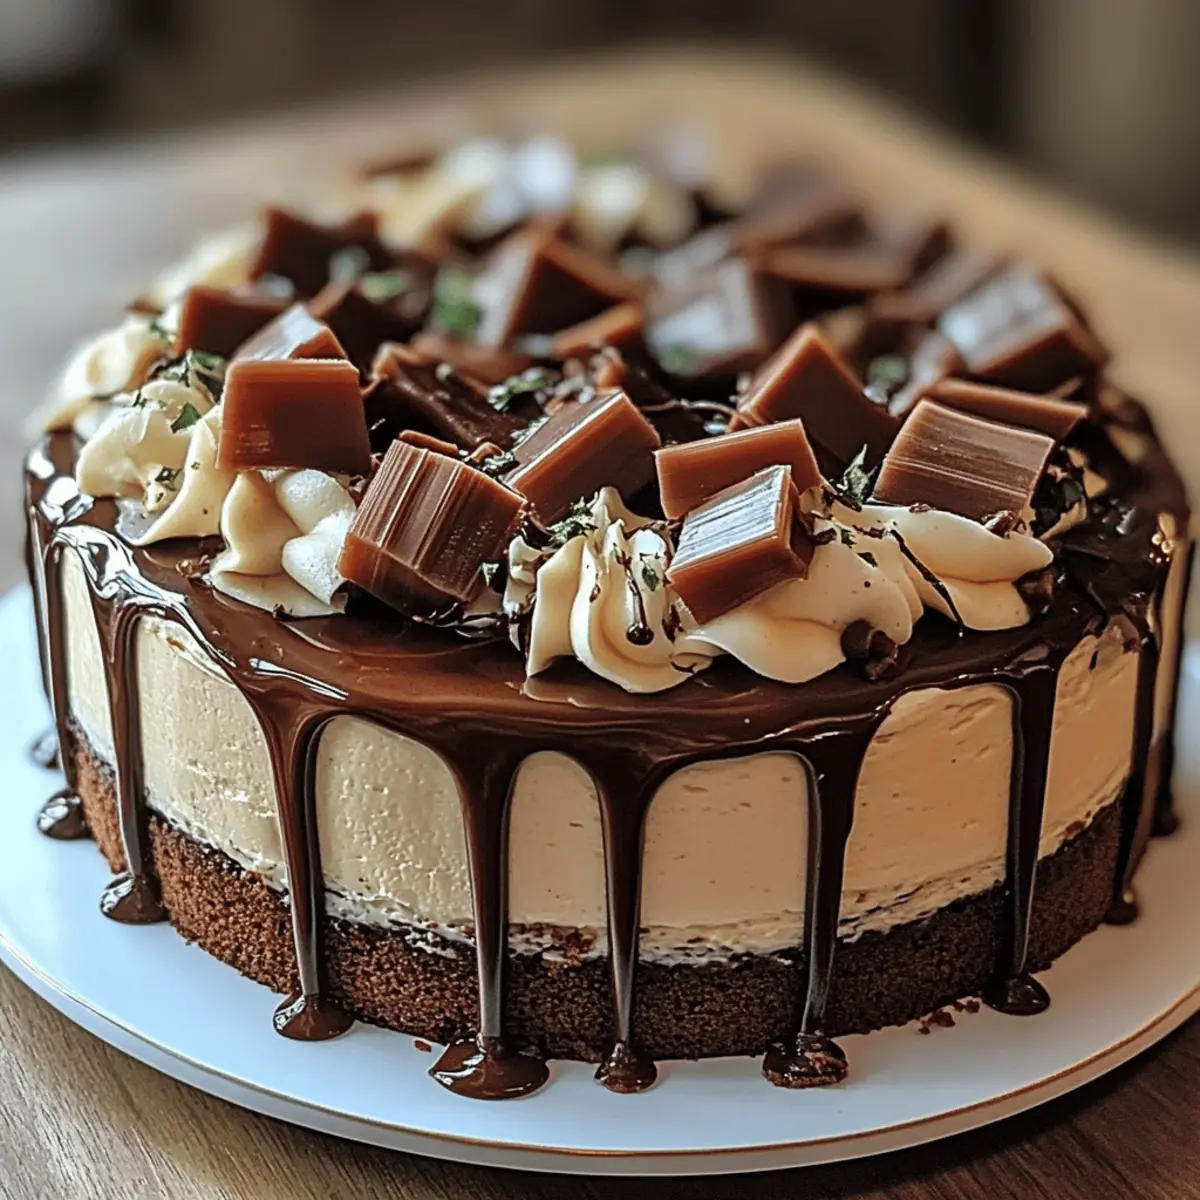
While flipping through an old recipe book, I stumbled upon a hidden gem that immediately whisked me back to my grandmother's cozy kitchen—the Cream Chocolate Cake. This luscious treat isn’t just a cake; it’s a nostalgic embrace that transforms any gathering into a celebration. With its rich chocolaty layers and silky cream cheese frosting, this cake effortlessly bridges the gap between comfort food and indulgence. What’s even better? It’s quick to prepare and perfect for impressing guests or simply satisfying a sweet craving after a long day. Trust me, once you try this recipe, you’ll never reach for store-bought again. Ready to discover how easy it is to bring this delightful slice of nostalgia to your table?
Why is this cake a must-try?
Irresistible chocolate flavor: This Cream Chocolate Cake packs a deep, rich cocoa punch, perfect for satisfying any chocolate lover's craving.
Quick and easy: With minimal prep and bake time, you can whip up this decadent treat without spending hours in the kitchen.
Perfect for any occasion: Whether it’s a birthday celebration, family gathering, or just a weekday pick-me-up, this cake fits every scenario.
Crowd-pleasing delight: Its luscious cream cheese frosting and moist layers ensure it's a hit with friends and family, leaving them begging for seconds!
Healthier twist: Enjoy the indulgence without the guilt; this recipe uses reduced-fat cream cheese, making it a lighter alternative.
Cream Chocolate Cake Ingredients
• Create your own slice of nostalgia with these simple essentials!
For the Cake
- All-purpose flour – Essential for structure, giving your cake that delightful softness.
- Granulated sugar – Adds sweetness and moisture to enhance the cake's texture.
- Unsweetened cocoa powder – The star ingredient, providing that rich chocolate flavor in your Cream Chocolate Cake.
- Baking powder – Helps your cake rise, making it fluffy and airy.
- Baking soda – Aiding in browning while working alongside the baking powder for optimal rise.
- Salt – A pinch balances the sweetness and enhances the chocolate taste.
- Large egg – Binds everything together, contributing moisture and richness.
- Low-fat milk – Keeps the cake moist without adding excess fat.
- Vegetable oil – Ensures a moist texture and prolongs the cake's freshness.
- Vanilla extract – Adds a wonderful depth of flavor that complements the chocolate perfectly.
- Boiling water – Activates the cocoa powder, making the cake even more deliciously rich.
For the Frosting
- Heavy whipping cream (cold) – Creates a whipped topping that adds lightness to your frosting.
- Reduced-fat cream cheese – Provides that creamy texture with fewer calories, maintaining the cake's decadent feel.
- Powdered sugar – Sweetens the frosting, giving it a smooth finish.
- Vanilla extract – Enriches the frosting flavor, harmonizing beautifully with the cake.
This Cream Chocolate Cake is closer than you think—gather these ingredients and embark on a baking journey to create a cake that’s unforgettable!
Step‑by‑Step Instructions for Cream Chocolate Cake
Step 1: Preheat and Prepare Pans
Begin by preheating your oven to 350°F (175°C). While the oven warms, grease two 8-inch round cake pans and line the bottoms with parchment paper. This will ensure your Cream Chocolate Cake layers come out easily and maintain their shape when removed from the pans.
Step 2: Mix Dry Ingredients
In a large mixing bowl, whisk together the all-purpose flour, granulated sugar, unsweetened cocoa powder, baking powder, baking soda, and salt until well combined. The mixture should be free of lumps and have a lovely chocolate aroma. This blend provides the foundation for your rich and moist cake.
Step 3: Add Wet Ingredients
Next, add the large egg, low-fat milk, vegetable oil, and vanilla extract to the dry mixture. Mix everything together until smooth and well combined. Then, carefully stir in the boiling water—your batter will be thin, but that’s perfect for a moist Cream Chocolate Cake.
Step 4: Bake the Cake Layers
Divide the batter evenly between the prepared cake pans. Place them in the preheated oven and bake for 28–30 minutes. To check for doneness, insert a toothpick into the center of each cake; if it comes out clean, the layers are ready. Allow the cakes to cool completely in the pans.
Step 5: Prepare the Cream Cheese Frosting
While the cakes cool, make the frosting. In a medium bowl, beat the softened reduced-fat cream cheese until it's smooth and creamy. Gradually add the powdered sugar and vanilla extract, mixing until fully combined. This will create a luscious base for your frosting that pairs beautifully with the chocolate layers.
Step 6: Whip the Heavy Cream
In a separate bowl, whip the cold heavy whipping cream until stiff peaks form. This step adds lightness and fluffiness to your frosting. Once whipped, gently fold the whipped cream into the cream cheese mixture until everything is smooth and creamy. This combination is what makes the frosting so delightful.
Step 7: Assemble the Cake
To bring your Cream Chocolate Cake to life, place one cooled cake layer on a serving plate. Spread half of the cream cheese frosting evenly over the top, ensuring every bite will be delicious. Gently place the second cake layer on top, and finish by spreading the remaining frosting over the top and sides of the cake.
Step 8: Serve and Enjoy
Once assembled, your Cream Chocolate Cake is ready to impress! Slice and serve it at room temperature to highlight the delicious taste and texture. This cake is perfect for any gathering, so whether it’s a special occasion or a sweet treat for yourself, enjoy every delightful bite.
Expert Tips for Cream Chocolate Cake
-
Room Temperature Ingredients: Ensure your egg and cream cheese are at room temperature for easier mixing and a smoother batter and frosting.
-
Measure Accurately: Use a kitchen scale for precise measurements, especially with flour and cocoa powder, as incorrect amounts can affect cake texture.
-
Avoid Overmixing: Mix the batter until just combined to keep the cake tender; overmixing can lead to a tough texture in your Cream Chocolate Cake.
-
Cool Completely: Let your cake layers cool fully in the pans before frosting to prevent melting your cream cheese frosting and maintain that perfect shape.
-
Whip it Right: Whip the heavy cream until stiff peaks form, creating a light and airy texture for your frosting that you'll love to spread.
Make Ahead Options
These Cream Chocolate Cake layers are perfect for meal prep, allowing you to enjoy an indulgent dessert with minimal day-of fuss! You can bake the cake layers up to 3 days in advance; simply let them cool completely, wrap in plastic wrap, and refrigerate. The frosting can also be prepared ahead, stored in an airtight container in the fridge for up to 24 hours. To maintain the quality, ensure the cake layers are tightly wrapped to prevent drying out. When you're ready to serve, simply assemble the cake by placing one layer on a plate, adding half of the frosting, and topping it with the second layer, completing the frosting on the top and sides for a beautiful finish. Enjoy your hassle-free, homemade treat!
How to Store and Freeze Cream Chocolate Cake
Fridge: Store the Cream Chocolate Cake in an airtight container in the fridge for up to 3 days. This keeps it fresh while the flavors continue to meld beautifully.
Freezer: Wrap slices tightly in plastic wrap or aluminum foil and place them in a freezer-safe container. They can be frozen for up to 3 months without sacrificing taste.
Reheating: To enjoy frozen slices, thaw them overnight in the fridge, then bring to room temperature before serving. A light whip of leftover frosting can refresh their appeal!
Countertop: If you're planning to serve the cake within a day, keep it covered at room temperature to maintain its moisture—this keeps each bite decadently satisfying.
What to Serve with Cream Chocolate Cake
Indulging in a slice of this delightful cake creates the perfect opportunity to elevate your meal experience with thoughtful pairings that complement its rich flavors.
-
Fresh Berries: Their bright tartness cuts through the cake's sweetness, adding a refreshing contrast that's simply irresistible.
-
Vanilla Ice Cream: A creamy scoop melting over a warm slice creates a delightful temperature contrast, enhancing every mouthful.
-
Espresso or Coffee: The deep, bold flavors of a fine brew enrich the chocolate experience, making your dessert feel sophisticated and indulgent.
-
Whipped Cream Topping: A dollop of lightly sweetened whipped cream adds airy fluffiness, balancing the richness of the chocolate and cream cheese frosting.
-
Chocolate Sauce Drizzle: For chocolate lovers, an additional drizzle brings an irresistible chocolate boost that further intensifies the dessert delight.
-
Toasted Nuts: Chopped almonds or walnuts add a satisfying crunch, introducing an exciting texture that plays beautifully against the moist cake layers.
-
Orange Zest: A sprinkle of citrus zest provides a bright flavor note that complements the chocolate, lifting the dessert to new heights of deliciousness.
-
Mint Tea: A soothing, aromatic tea complements the cake's richness while refreshing your palate, creating a harmonious end to your meal.
-
Chocolate-Covered Strawberries: For an extra touch of elegance, these make for a visually stunning and delicious accompaniment to your cake that guests will adore.
Pair any of these delightful options with your Cream Chocolate Cake, and watch as your gathering transforms into a warm, sweet celebration of flavors and memories!
Cream Chocolate Cake Variations
Feel free to explore these delightful twists and make this cake your very own!
-
Gluten-Free: Substitute all-purpose flour with a 1:1 gluten-free blend for a tasty alternative.
Transform this cake by embracing gluten-free goodness; it tastes just as magnificent! -
Dairy-Free: Use almond or soy milk instead of low-fat milk, and replace cream cheese with a dairy-free cream alternative.
Enjoy the same rich flavors but without any dairy; your guests will be none the wiser! -
Add Nuts: Fold in ½ cup of chopped walnuts or pecans into the batter for added crunch and a nutty flavor.
This variation offers texture that complements the cake’s softness perfectly with every bite. -
Minty Fresh: Add a teaspoon of peppermint extract to the batter for a refreshing twist.
Mint and chocolate are a match made in heaven, making each slice a delightful surprise! -
Flavor Boost: Enhance the chocolate experience by adding espresso powder (1 teaspoon) for a deeper cocoa flavor.
It intensifies the chocolate richness like nothing else, creating a divine, unforgettable sensation. -
Fruit Infusion: Layer slices with fresh raspberries or strawberries for a fruity contrast that balances the sweet richness.
The tartness cuts through the chocolate and adds a refreshing twist to your indulgent cake! -
Spice it Up: Add a pinch of cayenne pepper to the batter for a subtle kick that surprises the palate.
This unexpected heat adds warmth and depth, making your cake a conversation starter! -
Caramel Drizzle: Top with homemade or store-bought caramel sauce for an extra layer of sweetness and decadence.
That sticky, gooey element elevates your cake to dessert royalty; it’s pure bliss!
Cream Chocolate Cake Recipe FAQs
How do I choose the best cocoa powder for this cake?
Absolutely! Look for unsweetened cocoa powder that is rich and dark, as it will enhance the chocolaty flavor of your Cream Chocolate Cake. Brands like Ghirardelli or Valrhona are excellent options, due to their high quality and intense chocolate taste. Always check the expiration date as fresh cocoa provides better flavor.
What’s the best way to store leftovers?
Very! To keep your Cream Chocolate Cake fresh, store it in an airtight container in the fridge for up to 3 days. If you plan to enjoy it later, wrap meticulous slices tightly in plastic wrap or aluminum foil and place them in a freezer-safe container. This way, you can savor its deliciousness for up to 3 months!
Can I freeze the cake?
Of course! To freeze your Cream Chocolate Cake, it’s best to wrap each slice tightly in plastic wrap, then in aluminum foil to prevent freezer burn. Place them in a freezer-safe container. When you're ready to indulge, just thaw overnight in the fridge and enjoy at room temperature—the flavor will still be divine!
What if my cake turns out dry?
No worries—this can happen to the best of us! If you find your Cream Chocolate Cake is a bit dry, you can add a simple syrup to the layers. Just mix equal parts water and sugar, boil until sugar dissolves, and brush it onto the cake layers before frosting. This will add moisture and sweetness back into the cake.
Are there any dietary considerations for this recipe?
Absolutely! If you're cooking for someone with dietary restrictions, consider using gluten-free all-purpose flour and checking that your cocoa powder and baking powder are gluten-free as well. For dairy-free options, you can substitute the cream cheese with a dairy-free alternative and use coconut cream in place of heavy cream. Enjoy personalizing this recipe to fit everyone’s needs!
How long does the frosting last after making it?
Great question! Your cream cheese frosting can be stored in the fridge for about 3 days, but if you're using it for your Cream Chocolate Cake, it's best to frost the cake on the same day for optimum freshness. If you have leftover frosting, cover it tightly and chill; you can whip it again before using to restore its fluffy texture!
Indulgent Cream Chocolate Cake for Sweet Moments at Home
Ingredients
Equipment
Method
- Preheat your oven to 350°F (175°C) and grease two 8-inch round cake pans, lining the bottoms with parchment paper.
- In a large mixing bowl, whisk together flour, sugar, cocoa powder, baking powder, baking soda, and salt until combined.
- Add egg, milk, oil, and vanilla to the dry mixture, then stir in boiling water until smooth.
- Divide batter between prepared pans and bake for 28-30 minutes, checking for doneness with a toothpick. Let cool.
- Beat cream cheese until smooth, then add powdered sugar and vanilla, mixing well.
- Whip cold heavy cream until stiff peaks form, then gently fold into the cream cheese mixture until smooth.
- Place one cooled cake layer on a serving plate, spread half the frosting, place the second layer, and top with remaining frosting.
- Slice and serve at room temperature.

Leave a Reply