
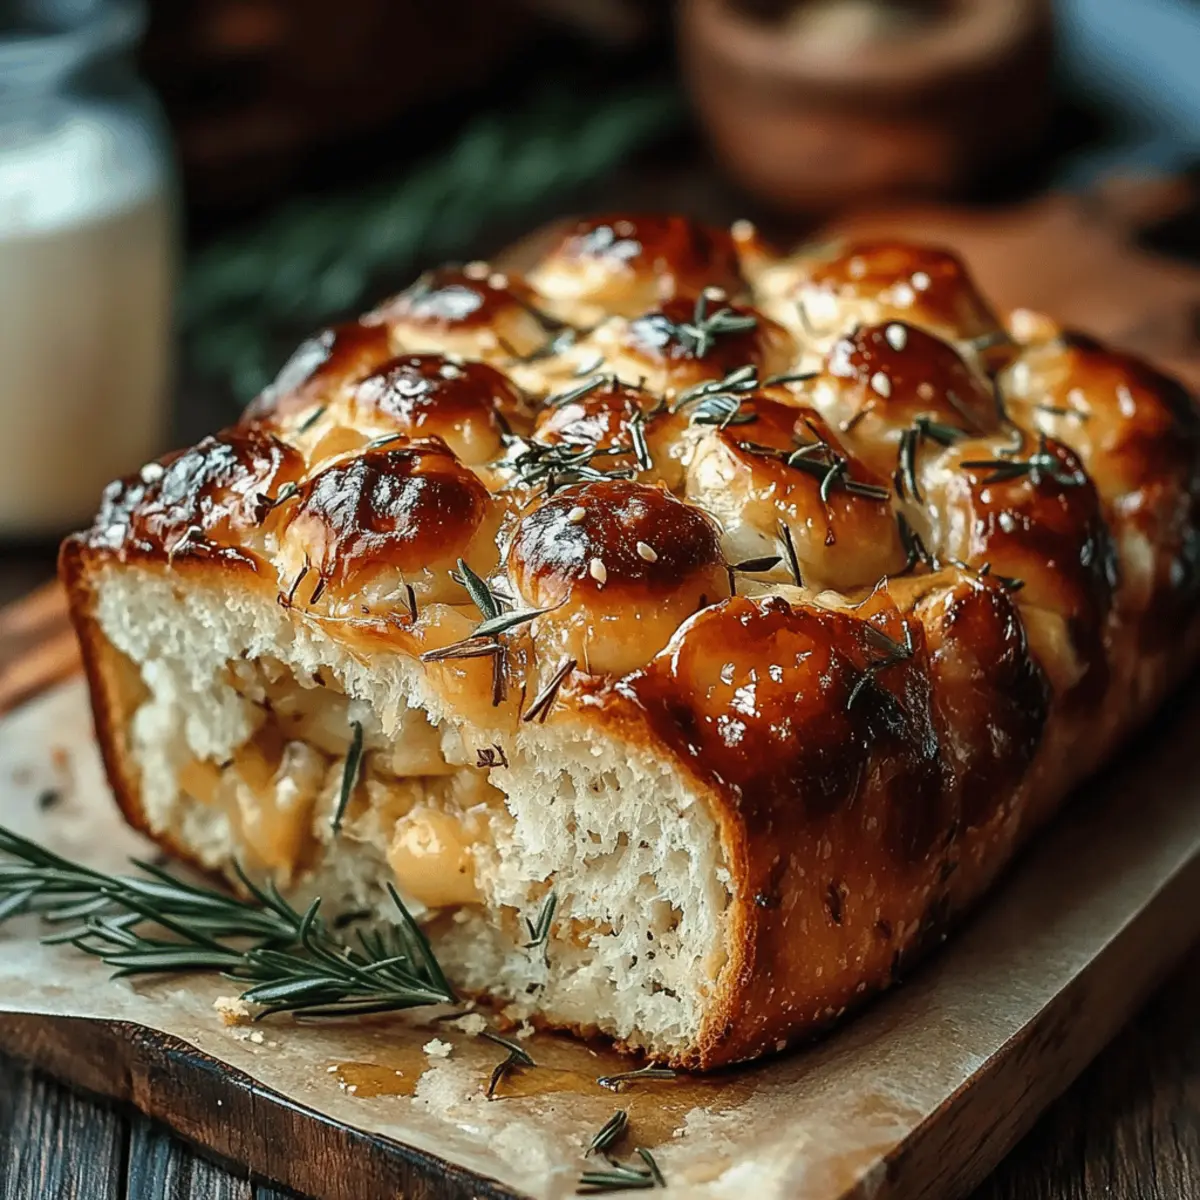
A warm, buttery aroma wafts through my kitchen as the dough rises, sending a gentle reminder of cherished family gatherings. This Garlic Rosemary Pull Apart Bread is not just a recipe; it’s a heartwarming centerpiece you can create in under an hour! Perfect for sharing with friends or enjoying a cozy night in, this delightful bread brings a comforting warm hug to your dinner table. With its simple prep and irresistible combination of garlic and rosemary, you'll discover that making homemade bread can be both approachable and rewarding. Plus, it's a fantastic way to impress your guests without spending all day in the kitchen! Are you ready to elevate your bread game?
Why is this bread so special?
Comforting Aroma: The moment you pull this bread from the oven, the warm scent of garlic and rosemary fills your home, captivating everyone around.
Easy to Make: With just a few simple steps, you can create a delicious treat that looks and tastes gourmet.
Cut-and-Share Fun: This pull apart bread is all about sharing; guests love tearing off pieces to enjoy with soups or salads.
Versatile Delight: Perfect as an appetizer, snack, or side dish, this bread complements any meal beautifully!
Quick Preparation: From oven to table in under an hour, it’s a great time-saver for busy weeknights or last-minute gatherings.
Get ready to cherish every buttery bite of this Rosemary Garlic Pull Apart Bread!
Rosemary Garlic Pull Apart Bread Ingredients
• Here’s what you need to make this delightful bread!
For the Dough
- 3.5 cups all-purpose flour – Essential for structure; feel free to use whole wheat for a nuttier flavor.
- 1 tablespoon sugar – Balances the savory elements and helps activate the yeast.
- 1 packet active dry yeast (2 ¼ teaspoons) – This yeast is the magic that causes your dough to rise beautifully.
- 1 teaspoon salt – Enhances flavor; never skip this, as it’s crucial for taste.
- 1 cup warm water (about 110°F) – Make sure it’s warm but not hot to keep the yeast alive and kickin’!
For the Flavoring
- 0.25 cups unsalted butter (melted) – Adds richness; use olive oil for a lighter twist.
- 4-5 cloves garlic (minced) – Fresh garlic creates that irresistible aromatic flavor in your Rosemary Garlic Pull Apart Bread.
- 2 tablespoons fresh rosemary (finely chopped) – This herb adds a fragrant touch; dried rosemary can be used in a pinch but fresh is best!
For Topping
- Coarse salt (optional, to taste) – A sprinkle brings out all the flavors at the end, but adjust to your preference!
Step‑by‑Step Instructions for Rosemary Garlic Pull Apart Bread
Step 1: Combine the Dry Ingredients
In a large mixing bowl, whisk together 3.5 cups of all-purpose flour, 1 tablespoon sugar, 1 packet of active dry yeast, and 1 teaspoon salt. Make sure to distribute the yeast evenly through the flour, as this is crucial for the rise. This step sets the foundation for your flavorful Rosemary Garlic Pull Apart Bread, so take your time to blend the ingredients well.
Step 2: Form the Dough
Slowly pour in 1 cup of warm water (around 110°F) while mixing with a wooden spoon or your hands until a sticky dough forms. Don’t rush this process; the dough should be cohesive but slightly tacky. Once combined, transfer the dough onto a floured surface, getting ready for kneading—this helps develop gluten for a lovely texture.
Step 3: Knead the Dough
Knead the dough for about 5-7 minutes, adding more flour as needed until the dough is smooth and elastic. You’ll know it’s ready when it springs back gently when pressed with your finger. This is an essential step for that perfect pillowy texture in your Rosemary Garlic Pull Apart Bread, so enjoy the tactile experience!
Step 4: Let the Dough Rise
Place the kneaded dough into a greased bowl, cover it with a clean kitchen towel, and let it rise in a warm spot until it doubles in size—about 1 hour. This resting time allows the yeast to work its magic, creating air pockets for a light and fluffy bread. Keep an eye on it; it should be about twice as big!
Step 5: Preheat the Oven
While the dough rises, preheat your oven to 350°F. This step ensures that the oven is hot and ready when your dough is transformed into buttery, golden perfection. Take out your baking dish and prepare it by greasing it lightly to prevent sticking, ensuring an easy release once baked.
Step 6: Punch Down and Divide the Dough
Once the dough has risen, gently punch it down to release excess air. Transfer it to a lightly floured surface and divide it into small, equal pieces. Aim for about 20 pieces, roughly the size of golf balls. This division is key for creating the pull-apart effect of your Rosemary Garlic Pull Apart Bread, making it perfect for sharing.
Step 7: Prepare the Flavor Coating
Roll each piece into a smooth ball. In a small bowl, combine melted butter, minced garlic, and fresh rosemary. Dip each dough ball into this fragrant mixture, coating well. The melted butter helps the garlic and rosemary infuse their amazing flavors into the dough, creating a delightful aroma that will fill your kitchen.
Step 8: Arrange in the Baking Dish
Layer the coated dough balls in the greased baking dish, stacking them closely together. This method encourages the bread to rise together, creating that coveted pull-apart texture. Feel free to sprinkle some coarse salt over the top for an added burst of flavor, giving your Rosemary Garlic Pull Apart Bread a gourmet touch.
Step 9: Bake the Bread
Place the baking dish into the preheated oven and bake for 25-30 minutes, or until the top is golden brown and a toothpick inserted in the center comes out clean. Keep an eye on the color; the goal is a beautifully browned surface that looks irresistible. Your home will soon be filled with that tantalizing aroma!
Step 10: Finish and Serve
Once baked, remove your Rosemary Garlic Pull Apart Bread from the oven and brush the top with additional melted butter for a glossy, appetizing finish. Allow it to cool slightly before serving, as this will help the flavors meld. Tear apart those warm, fragrant pieces and enjoy a delightful experience with friends or family!
How to Store and Freeze Rosemary Garlic Pull Apart Bread
Room Temperature: Store the bread in an airtight container at room temperature for up to 2 days to keep it fresh and soft.
Fridge: If you need to store it longer, you can refrigerate the bread, but it may lose some of its delightful texture. Use within 3 days.
Freezer: For extended storage, wrap the bread tightly in plastic wrap and then in foil; it can last up to 3 months in the freezer without losing flavor.
Reheating: To enjoy the warmth again, reheat in the oven at 350°F for about 10-15 minutes, perfect for bringing back that irresistible aroma!
What to Serve with Garlic Rosemary Pull Apart Bread
A comforting loaf like this invites delightful pairings that elevate your dining experience.
- Tomato Basil Soup: This classic combo pairs beautifully, with the rich, tangy soup perfectly offsetting the savory bread.
- Caesar Salad: The crisp romaine and creamy dressing provide a fresh crunch that contrasts the warm, fluffy texture of the pull apart bread. Serve alongside for a delightful balance of flavors.
- Roasted Vegetables: A medley of seasonal veggies adds vibrant colors and earthy flavors, making for a healthy and colorful meal complement.
- Herbed Cream Cheese Dip: Spread this luscious dip on tender bread pieces for an indulgent appetizer that guests will adore.
- Grilled Chicken: Simple lemon-herb grilled chicken keeps the focus on your pull apart bread while adding protein to round out the meal beautifully.
- Garlic Butter Shrimp: Exquisite seafood with garlicky flavors ties perfectly to the bread’s innate garlic essence, creating a harmonious dining experience.
- Sangria: The fruity, wine-based drink refreshes between bites, enhancing the richness of the buttery bread while providing a festive touch.
- Chocolate Mousse: For dessert, a silky chocolate mousse offers a rich finale to your meal, complementing the savory starter beautifully.
Each pairing adds depth to your meal and enhances the heartwarming experience of sharing Garlic Rosemary Pull Apart Bread with loved ones.
Make Ahead Options
These Rosemary Garlic Pull Apart Bread bites are perfect for meal prep enthusiasts! You can prepare the dough and let it rise up to 24 hours in advance—just cover it tightly with plastic wrap in the fridge to keep it fresh and maintain its texture. If you prefer, roll the individual dough balls in the garlic and rosemary mixture and refrigerate them for up to 3 days. To finish, simply preheat your oven and bake the dough as instructed; there’s no need to let the bread rise again! This way, you'll have warm, buttery, and fragrant bread ready to delight your guests with minimal effort. Enjoy more time around the table, not in the kitchen!
Expert Tips for Rosemary Garlic Pull Apart Bread
• Knead with Care: Avoid over-kneading your dough. Aim for a smooth and elastic texture, but be gentle to retain the air pockets for that fluffy pull-apart effect.
• Perfect Rising: Make sure your dough rises in a warm, draft-free spot. Cold air can hinder yeast activity, preventing your bread from achieving its full height.
• Butter Brushing: Brush melted butter on the bread after baking to enhance flavor and give a beautiful golden shine. Don’t skip this step—it makes a significant difference!
• Customize Flavors: Feel free to experiment with herbs or spices. Adding a pinch of chili flakes can give your Rosemary Garlic Pull Apart Bread a delightful kick!
• Check Doneness: Use a toothpick to test if it’s fully baked. If it comes out clean from the center, your bread is perfectly done. Enjoy the aroma!
Rosemary Garlic Pull Apart Bread Variations
Feel free to let your creativity shine as you explore these exciting twists on this beloved recipe!
-
Gluten-Free: Substitute all-purpose flour with a 1:1 gluten-free blend for a similar texture without gluten. Be sure to check the blend includes xanthan gum for better elasticity.
-
Herb-Infused: Add thyme or oregano alongside the rosemary for a more aromatic flavor profile that makes your bread even more fragrant, inviting everyone to the table.
-
Cheesy Delight: Incorporate shredded mozzarella or cheddar into the dough balls before baking for a melty, cheesy surprise in every pull-apart piece. Say goodbye to plain bread and hello to cheesy goodness!
-
Spicy Twist: Mix in red pepper flakes or sprinkle some chopped jalapeños into the garlic-butter mixture to bring a flavorful heat. This twist will awaken your taste buds and add an exciting zing.
-
Vegan Option: Replace butter with olive oil and use a vegan substitute for the yeast to make this recipe plant-based while keeping all the flavor intact.
-
Sweet Variation: Swap garlic and rosemary for cinnamon and a bit of sugar for a sweet pull-apart bread that’s perfect for breakfast or dessert. Drizzle with icing afterward for that extra touch!
-
Stuffed Pull-Aparts: Fill each dough ball with a dollop of pesto or even some chopped sun-dried tomatoes for a burst of flavor. Your guests will love discovering the tasty surprises inside!
-
Melt-In-Your-Mouth: Brush the top with a blend of garlic powder, parsley, and Parmesan cheese before baking for a delightful crust that enhances flavor and texture. It adds an irresistible crunch!
Unlock new dimensions of taste and comfort with these variations while keeping that comforting essence of your Rosemary Garlic Pull Apart Bread. Enjoy your baking journey!
Rosemary Garlic Pull Apart Bread Recipe FAQs
What type of flour should I use for best results?
Absolutely! For the fluffiest texture, stick to all-purpose flour. If you’re feeling adventurous, you might try substituting some with whole wheat flour for a nuttier flavor, but keep in mind that it may change the texture slightly.
How do I know if my dough has risen enough?
The dough should approximately double in size; after 1 hour, gently poke it with your finger. If the indentation stays, you’re all set! If it bounces back quickly, give it more time to rise. A warm, draft-free area is ideal, and it should feel light and puffy when ready.
Can I freeze the pull apart bread? If so, how?
Definitely! To freeze your Rosemary Garlic Pull Apart Bread, let it cool completely, then wrap it tightly in plastic wrap followed by foil. It can last up to 3 months in the freezer. When you’re ready to enjoy it, simply thaw overnight in the fridge, then reheat in the oven at 350°F for 10-15 minutes to revive that warm, buttery goodness.
What’s the best way to store leftover bread?
For optimal freshness, store your bread in an airtight container at room temperature for up to 2 days. If you anticipate not finishing it in that time, refrigerating it is an option, though it may dry out a bit—use within 3 days for the best flavor!
Can I make this bread without garlic?
Of course! If garlic isn’t your thing or you’re cooking for someone with a sensitivity, simply omit it or substitute it with a different herb like thyme or basil for a unique twist. The beauty of this Rosemary Garlic Pull Apart Bread is its versatility!
What should I do if my dough is too sticky?
If your dough feels overly sticky while kneading, don’t panic! Simply sprinkle a little extra flour on your work surface and on your hands as you knead. Add just enough flour to make the dough manageable without overdoing it, and remember, it’s better to err on the side of slightly tacky than overly dry for that fluffy texture!
Irresistible Rosemary Garlic Pull Apart Bread You’ll Adore
Ingredients
Equipment
Method
- In a large mixing bowl, whisk together the all-purpose flour, sugar, active dry yeast, and salt.
- Slowly pour in warm water while mixing until a sticky dough forms.
- Knead the dough for about 5-7 minutes until smooth and elastic.
- Place the dough in a greased bowl, cover with a towel, and let it rise until doubled in size (about 1 hour).
- Preheat your oven to 350°F and prepare your baking dish by greasing it lightly.
- Gently punch down the risen dough and divide it into small balls, about 20 pieces.
- In a small bowl, combine melted butter, minced garlic, and fresh rosemary. Dip each dough ball into this mixture.
- Layer the dough balls in the greased baking dish, stacking closely together.
- Bake for 25-30 minutes until golden brown and a toothpick comes out clean.
- Once baked, brush with additional melted butter and allow to cool slightly before serving.


Leave a Reply