
There's something absolutely magical about the crunch of perfectly breaded cutlets meeting a fluffy bed of rice. As I stood in my kitchen, the aroma of sizzling crispy Japanese Katsu Bowls enveloped me, igniting nostalgia for my travels in Japan. This recipe combines the heartwarming comforts of home-cooked food with a quick prep time, making it an irresistible choice for any weeknight dinner. Not only does this dish delight with its crispy texture and vibrant garnishes, but it also leaves you feeling satisfied and energized. Plus, it's delightfully versatile—feel free to substitute the chicken or pork with your favorite vegetarian options like tofu or eggplant. Are you ready to bring a taste of Japan to your table and impress your family and friends?
Why are Crispy Japanese Katsu Bowls a Must-Try?
Crispy texture: The crunchy panko coating provides a satisfying crunch that perfectly contrasts with tender meat.
Quick and easy: With just 30 minutes from start to finish, this recipe is a lifesaver for busy weeknights.
Versatile options: Swap in tofu or eggplant for a delicious vegetarian twist that everyone will enjoy.
Flavor-packed: A drizzle of savory katsu sauce elevates the dish, making each bite absolutely irresistible.
Crowd-pleaser: Perfect for family dinners or impressing guests, these katsu bowls are sure to satisfy everyone at the table!
Crispy Japanese Katsu Bowls Ingredients
• Ready to get cooking? Here's what you'll need!
For the Cutlets
- Boneless chicken or pork cutlets – 4 pieces, pounded thin for even cooking and maximum crunch.
- All-purpose flour – 1 cup, helps the egg adhere to the cutlets, ensuring a crispy finish.
- Large eggs – 2, beaten; they act as a binding agent for the panko breadcrumbs.
- Panko breadcrumbs – 1 ½ cups, these Japanese breadcrumbs give that signature crunchy texture in crispy Japanese Katsu Bowls.
For Cooking
- Vegetable oil – Enough for frying; the oil should be hot to achieve a golden brown crust.
For Serving
- Steamed rice – 2 cups, this fluffy base complements the crispy cutlets perfectly.
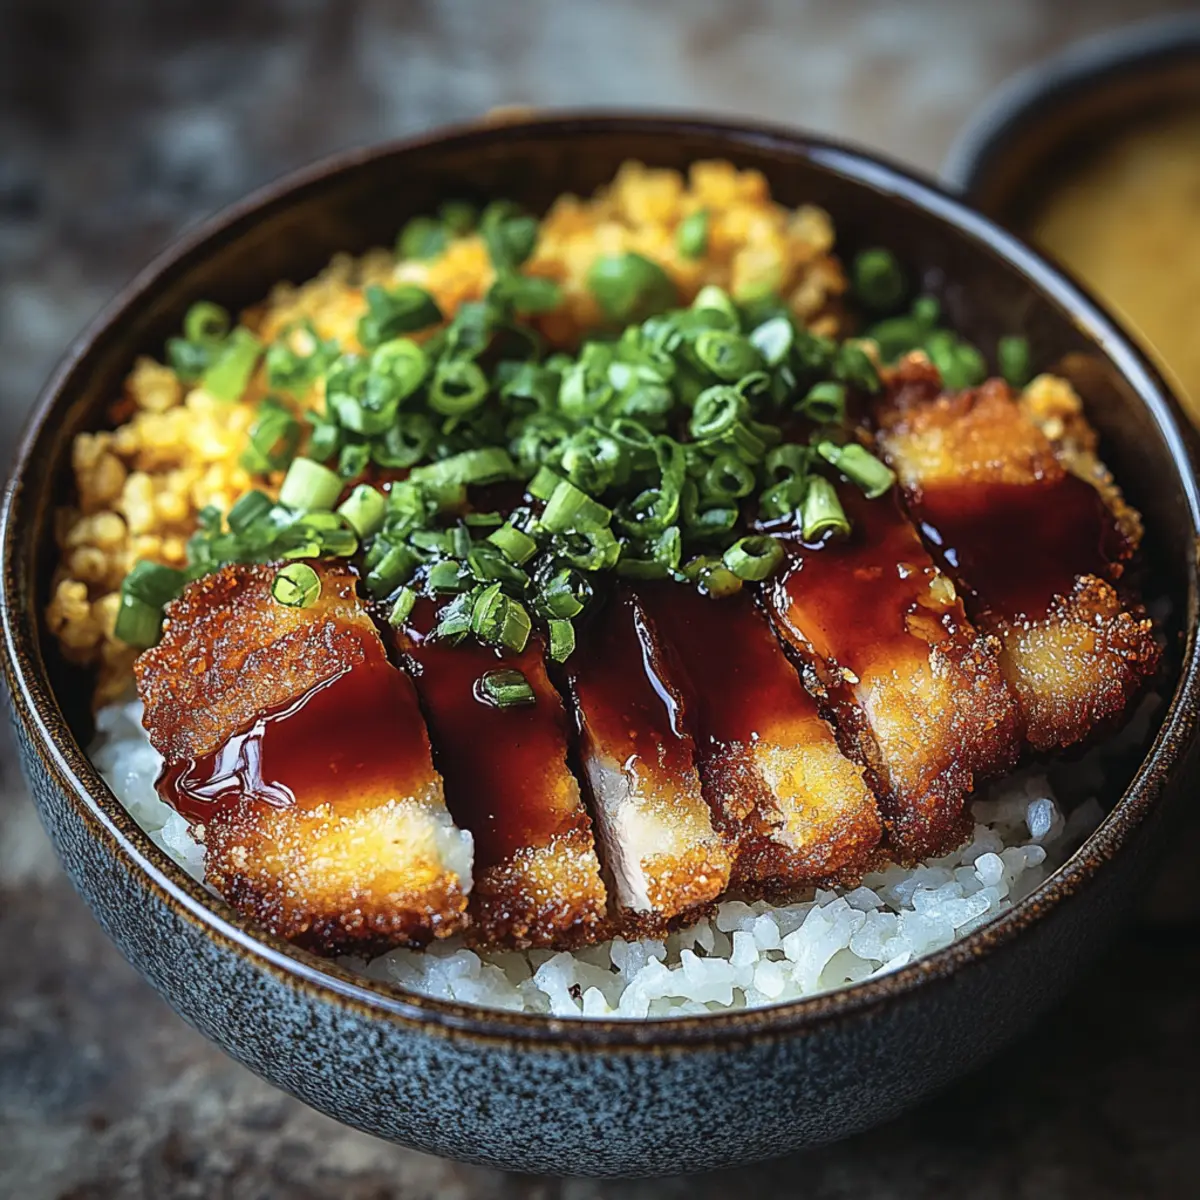
- Shredded cabbage – 1 cup, adds fresh crunch and color to your bowl.
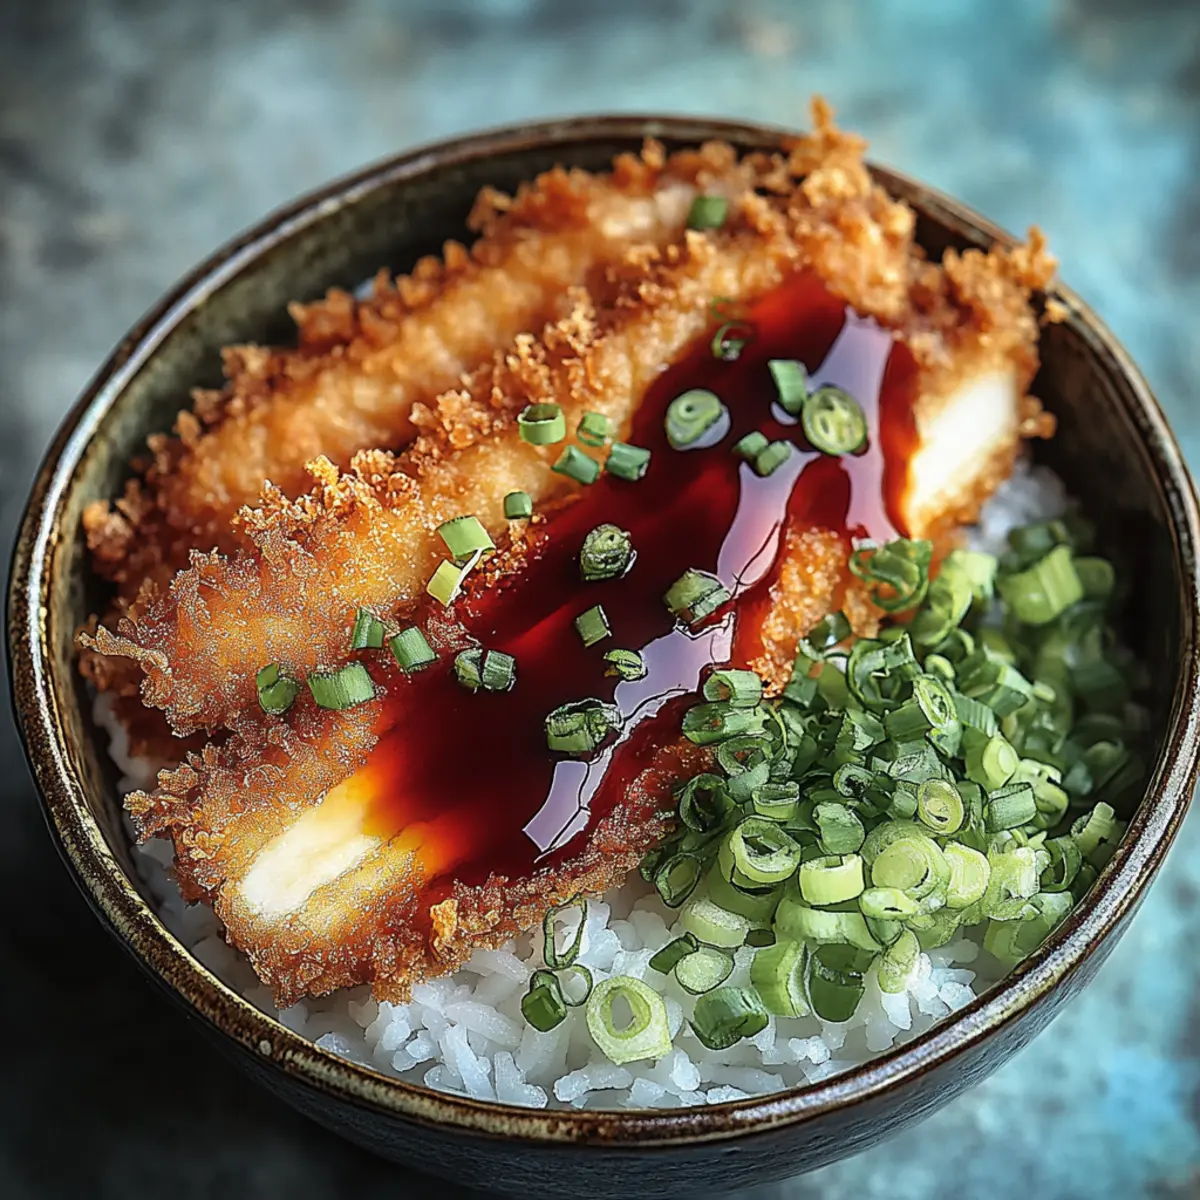
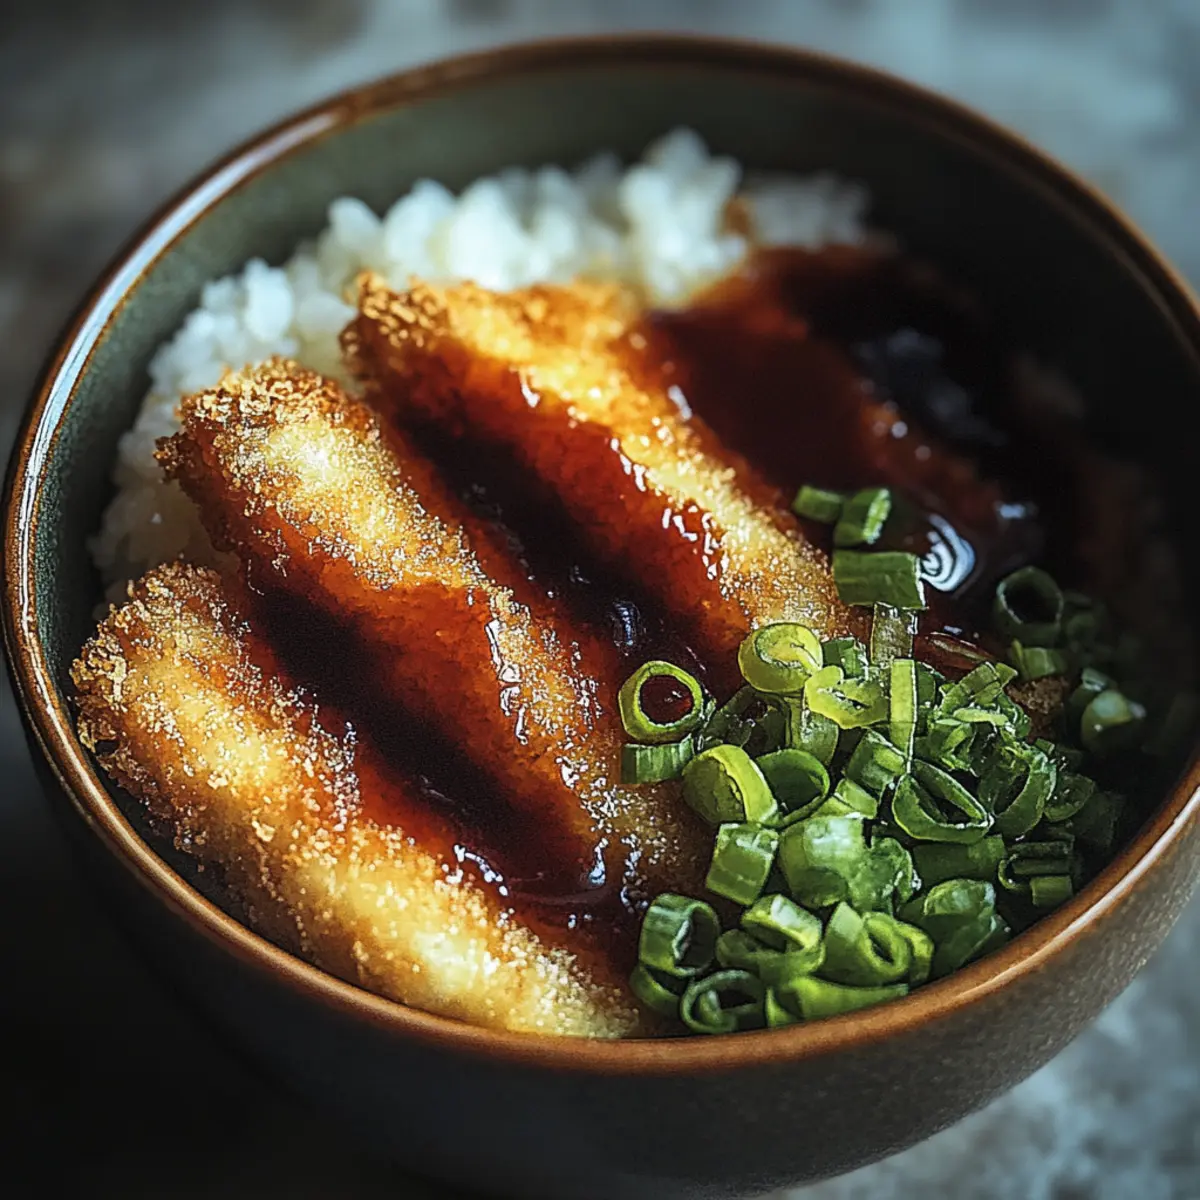
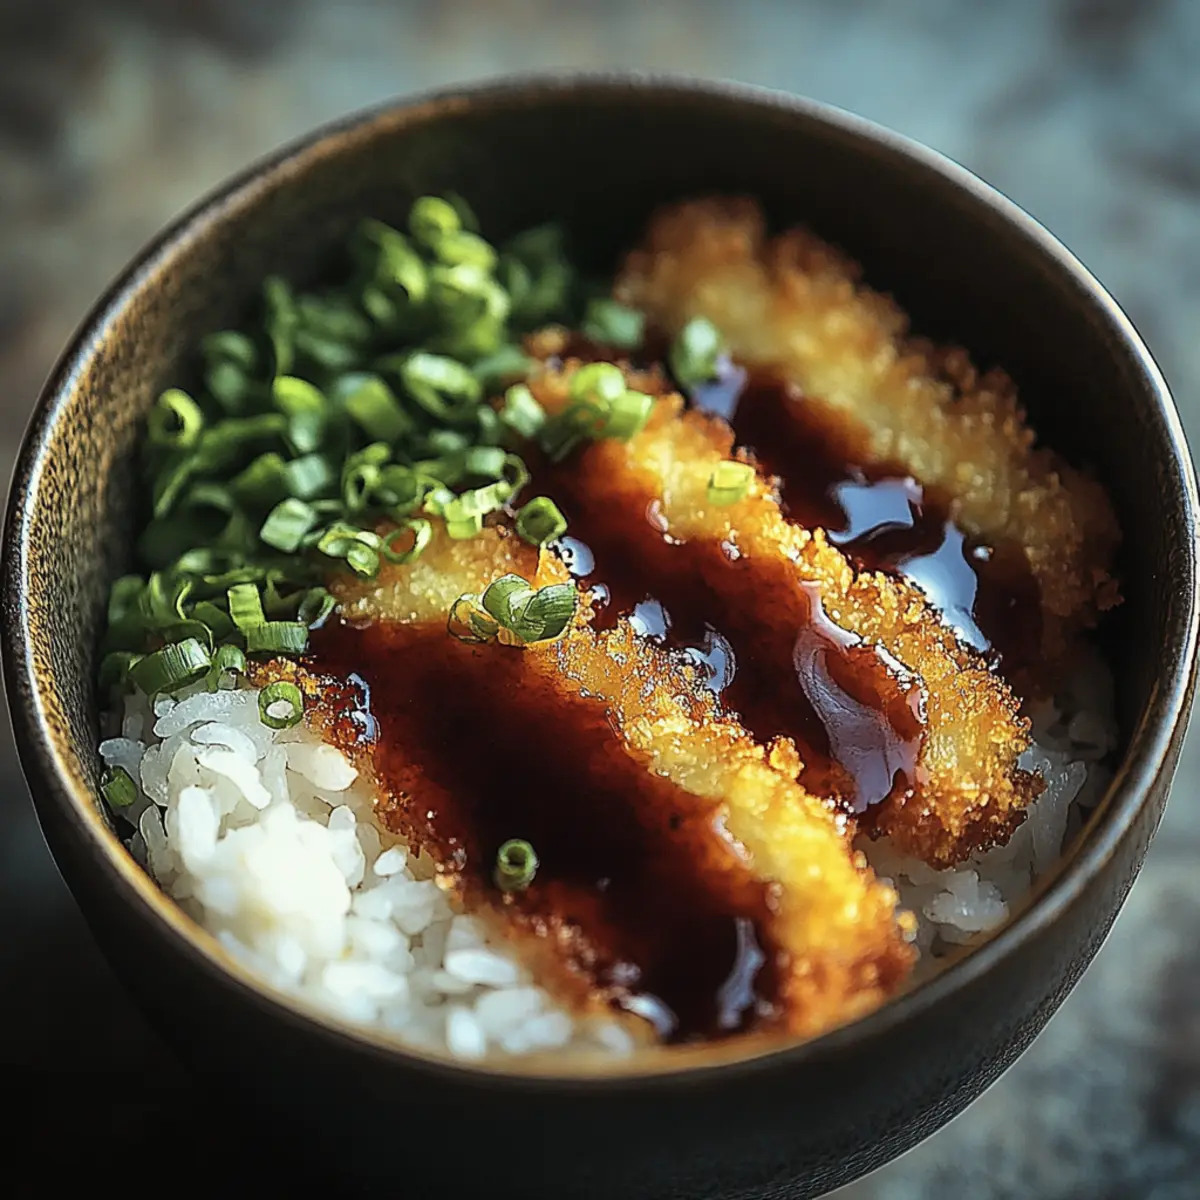
- Sliced scallions – ¼ cup, for a hint of onion flavor and garnish.
- Katsu sauce – Drizzle generously for that sweet and savory boost.
- Sesame seeds – Optional garnish, adds an extra layer of flavor and visual appeal.
Step‑by‑Step Instructions for Crispy Japanese Katsu Bowls
Step 1: Prepare the Cutlets
Start by lightly pounding the boneless chicken or pork cutlets to an even thickness of about ½ inch, ensuring they cook uniformly. This will create a tender bite and allow for maximum crunch when fried. Set your meat aside as you prepare your breading station.
Step 2: Set Up the Breading Station
Arrange three shallow dishes in a row: one filled with flour, a second with the beaten eggs, and a third with seasoned panko breadcrumbs. Begin the breading process by dredging each cutlet in flour—shake off any excess to avoid clumping, then dip it in the eggs, ensuring it's fully coated before moving to the panko for the final crispy coat.
Step 3: Fry the Cutlets
In a large skillet, heat enough vegetable oil over medium-high heat until shimmering—about 350°F (175°C). Carefully add the breaded cutlets, frying them for about 3-4 minutes on each side or until they are a beautiful golden brown. Use tongs to flip them gently, ensuring even cooking and a delightful crispy exterior. Drain on paper towels to absorb excess oil.
Step 4: Steam the Rice
While the cutlets are frying, steam your rice in a rice cooker or on the stovetop until fluffy and tender. This should take about 15 minutes, depending on your method. The perfectly cooked rice will serve as a warm and comforting base for your crispy Japanese Katsu Bowls.
Step 5: Prepare the Garnishes
As you wait for the rice to finish, gather your garnishes. Shred the cabbage into thin strips and slice the scallions into small pieces. These fresh toppings not only brighten the dish visually but also add a crunchy texture and refreshing flavor to balance the richness of the katsu cutlets.
Step 6: Assemble the Bowls
To serve, begin with a generous scoop of steamed rice in each bowl, creating a warm bed for the crispy cutlets. Lay the sliced, golden brown cutlets on top of the rice and drizzle each bowl with a luscious amount of katsu sauce. Finish with a scattering of shredded cabbage, sliced scallions, and optional sesame seeds for a beautiful presentation.
Step 7: Add Optional Sides
If desired, enhance your meal with sides like pickled vegetables, miso soup, or a light seaweed salad. These optional accompaniments will complement the main dish, creating a well-rounded experience for your family or guests as they enjoy these irresistible Crispy Japanese Katsu Bowls.
Storage Tips for Crispy Japanese Katsu Bowls
Fridge: Store leftover crispy cutlets in an airtight container for up to 3 days. This keeps them fresh and ready for a quick meal!
Freezer: To enjoy your katsu bowls later, wrap the cutlets tightly in plastic wrap and foil, then freeze for up to one month.
Reheating: For the best texture, reheat the cutlets in an oven or air fryer at 350°F for about 10 minutes, restoring their delicious crunch.
Rice Storage: Keep steamed rice in an airtight container in the fridge for up to 4 days. Reheat with a splash of water to prevent drying out.
Make Ahead Options
Crispy Japanese Katsu Bowls are a fantastic meal prep option for busy home cooks! You can bread the cutlets and store them in the refrigerator for up to 24 hours, ensuring they maintain their crispiness. Simply follow the breading steps (flour, egg, and panko coating) and place them on a parchment-lined baking sheet in the fridge. If you're short on time, you can also steam the rice in advance and refrigerate it for up to 3 days. When you’re ready to serve, just fry the breaded cutlets until they're perfectly golden and reheat the rice in the microwave or on the stovetop, for restaurant-quality results with minimal effort. Enjoy the delightful crunch and flavor of these make-ahead katsu bowls any night of the week!
Expert Tips for Crispy Japanese Katsu Bowls
• Even Thickness: Always pound the cutlets to an even thickness of ½ inch for uniform cooking and maximized crunch in your crispy Japanese Katsu Bowls.
• Proper Breading: Don’t rush your breading process! Make sure each cutlet is evenly coated in flour, egg, and panko for the best texture.
• Oil Temperature: Use a thermometer to ensure the oil is hot enough (around 350°F) before frying. If it’s too cool, the cutlets will become greasy.
• Cooking Time: Keep an eye on the frying time; 3-4 minutes per side should get you golden brown and perfectly cooked cutlets.
• Rest the Cutlets: Let your cutlets drain on paper towels for a minute before assembling your bowls to preserve their crispy texture.
• Garnish Generously: Don’t skimp on the garnishes! Fresh cabbage and scallions add important flavor and crunch, making your crispy Japanese Katsu Bowls truly standout.
Crispy Japanese Katsu Bowls Variations
Feel free to let your culinary creativity shine with these delightful twists on the classic katsu bowls!
- Dairy-Free: Use almond or coconut milk to replace eggs in the breading process for a dairy-free delight.
- Vegetarian Option: Substitute chicken or pork with firm breaded tofu or eggplant slices for a mouthwatering plant-based dish.
- Gluten-Free: Swap the all-purpose flour and panko breadcrumbs for gluten-free alternatives like almond flour and gluten-free breadcrumbs.
- Spicy Kick: Add a dash of chili powder to the flour or serve with spicy mayo to elevate the heat factor in your katsu.
- Flavorful Marinade: Marinate your cutlets in soy sauce and ginger for 30 minutes before breading for a flavor-packed punch.
- Crunchy Toppings: Sprinkle crispy shallots or fried garlic over the finished bowls for an extra textural delight.
- Coconut Rice: Cook your rice in coconut milk instead of water for a creamy, tropical twist that accompanies the cutlets beautifully.
- Savory Sauces: Drizzle teriyaki or sweet chili sauce instead of traditional katsu sauce for a unique flavor twist that dazzles the palate.
What to Serve with Crispy Japanese Katsu Bowls
There's nothing quite like crafting a well-rounded meal to complement the savory delight of fried cutlets atop fluffy rice.
-
Creamy Miso Soup: This warm, umami-packed soup enhances the flavors of the katsu while providing a comforting contrast.
-
Light Seaweed Salad: Deliciously crunchy and refreshing, this salad adds a subtle oceanic flavor that balances the richness of the katsu perfectly.
-
Pickled Vegetables: A vibrant mix of pickled radish and cucumber offers a tangy crunch that freshens up each bite, making for a delightful pairing.
-
Steamed Broccoli: Tender, steamed broccoli introduces fresh greens to the mix, offering a pop of color and essential nutrients alongside the savory katsu bowls.
-
Japanese Beer or Sake: A chilled can of Japanese beer or a glass of sake complements the various flavors beautifully and highlights the dish's cultural roots.
-
Fluffy Garlic Rice: For those who crave extra flavor, garlic-infused rice provides a rich base that pairs wonderfully with the crispy cutlets.
-
Coconut Mochi Balls: For dessert, these chewy treats offer sweetness that concludes the meal on an indulgent note, making it feel complete.
Crispy Japanese Katsu Bowls Recipe FAQs
How do I choose the best cutlets for Crispy Japanese Katsu Bowls?
Absolutely! For the best results, opt for boneless chicken or pork cutlets that are evenly trimmed. Look for cutlets that are firm to the touch and free from dark spots. Fresh meat will not only enhance flavor but will also provide a more tender bite when cooked.
What’s the best way to store leftover Katsu Bowls?
For sure! Store any leftover crispy cutlets in an airtight container in the refrigerator for up to 3 days. To keep them crispy, place sheets of paper towel between layers to absorb moisture. If you're not planning to eat them soon, wrap the cutlets tightly in plastic wrap and foil to freeze for up to one month.
Can I freeze the cutlets for later use?
Absolutely! To freeze your cutlets, wait until they have completely cooled. Wrap each cutlet tightly in plastic wrap, followed by aluminum foil to prevent freezer burn. Store them in a freezer-safe bag or container. When you're ready to enjoy, simply reheat in the oven at 350°F for about 10 minutes, which helps maintain that wonderful crunch.
What should I do if my cutlets aren't crispy enough?
Very! If your cutlets aren’t turning out crispy, make sure your oil is hot enough before you start frying—around 350°F is ideal. Additionally, ensure that each cutlet is thoroughly covered in panko breadcrumbs, and avoid overcrowding the pan during frying. This allows the heat to circulate properly, resulting in that perfect crunchy texture!
Are there any dietary considerations I should be aware of for Crispy Japanese Katsu Bowls?
Yes, indeed! If serving to individuals with allergies, be mindful of common allergens such as gluten in the flour and breadcrumbs, as well as egg in the batter. For a vegetarian option, you can substitute the cutlets with breaded tofu or eggplant. Just follow the same breading and cooking method for a delightful twist!
Irresistibly Crunchy Crispy Japanese Katsu Bowls Recipe
Ingredients
Equipment
Method
- Prepare the Cutlets by lightly pounding them to an even thickness of about ½ inch.
- Set Up the Breading Station with flour, beaten eggs, and seasoned panko breadcrumbs.
- Fry the Cutlets in a large skillet with heated vegetable oil until golden brown.
- Steam the Rice until fluffy and tender.
- Prepare the Garnishes by shredding cabbage and slicing scallions.
- Assemble the Bowls starting with steamed rice, topped with cutlets and drizzled with katsu sauce.
- Add Optional Sides like pickled vegetables or miso soup if desired.
Leave a Reply