
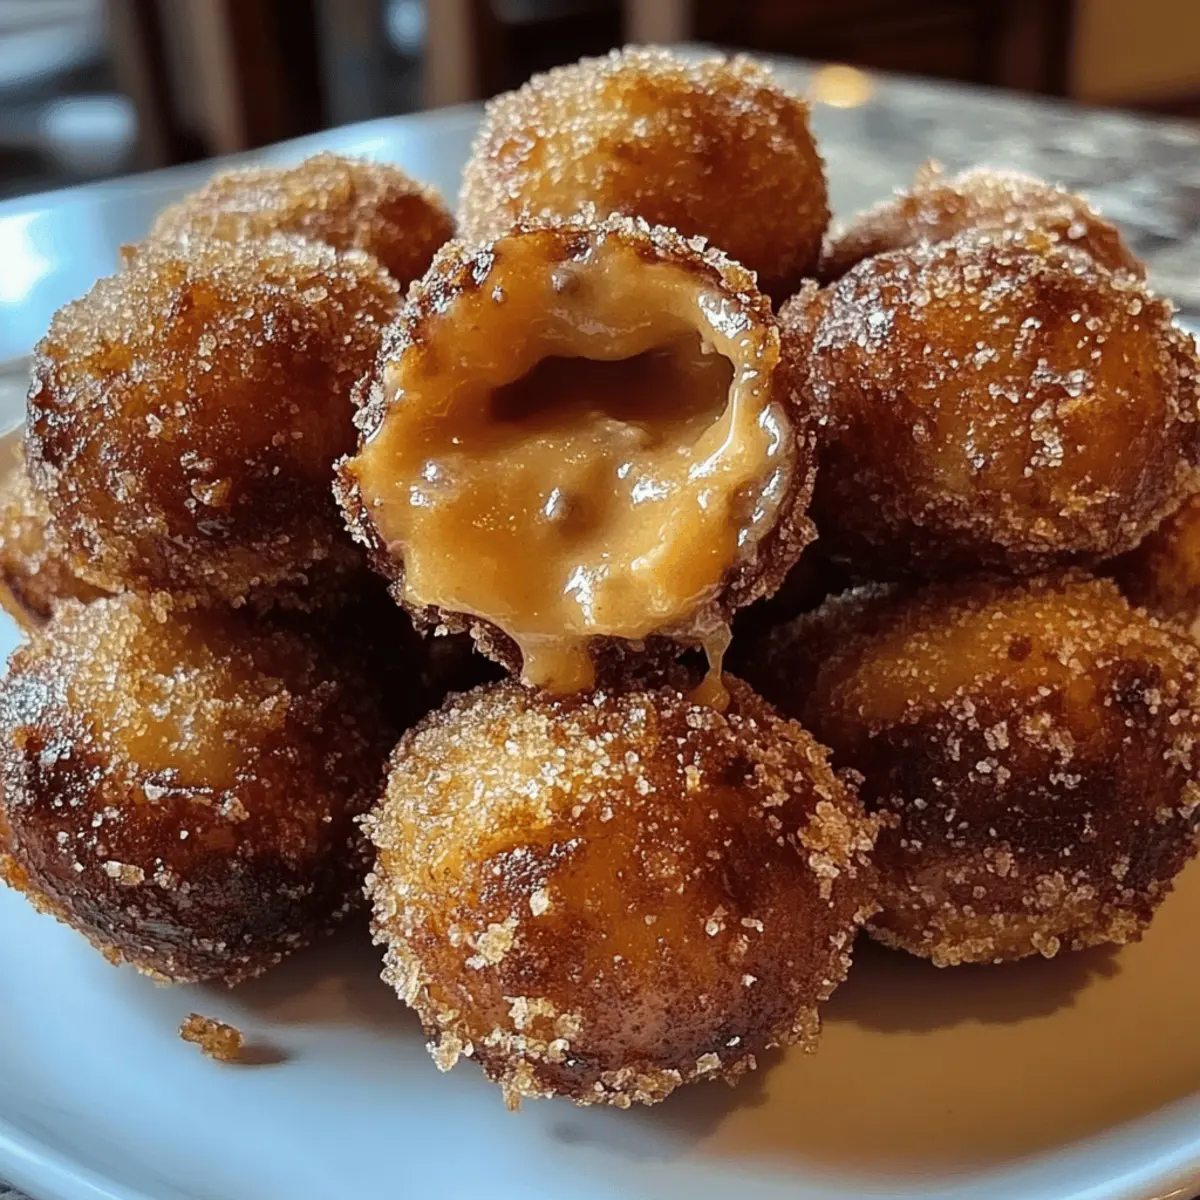
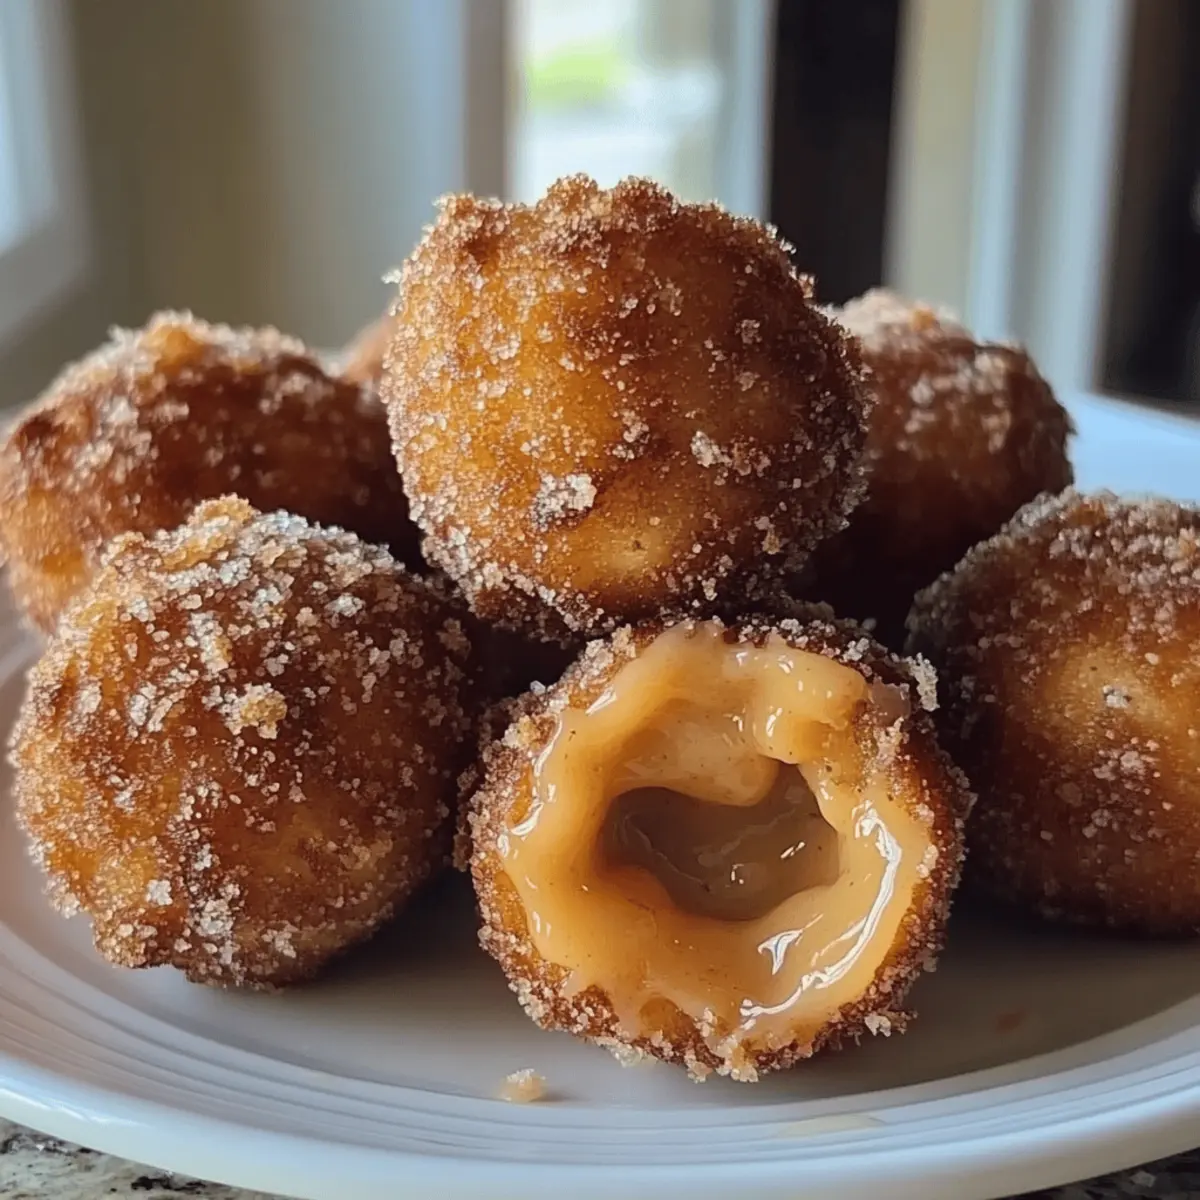
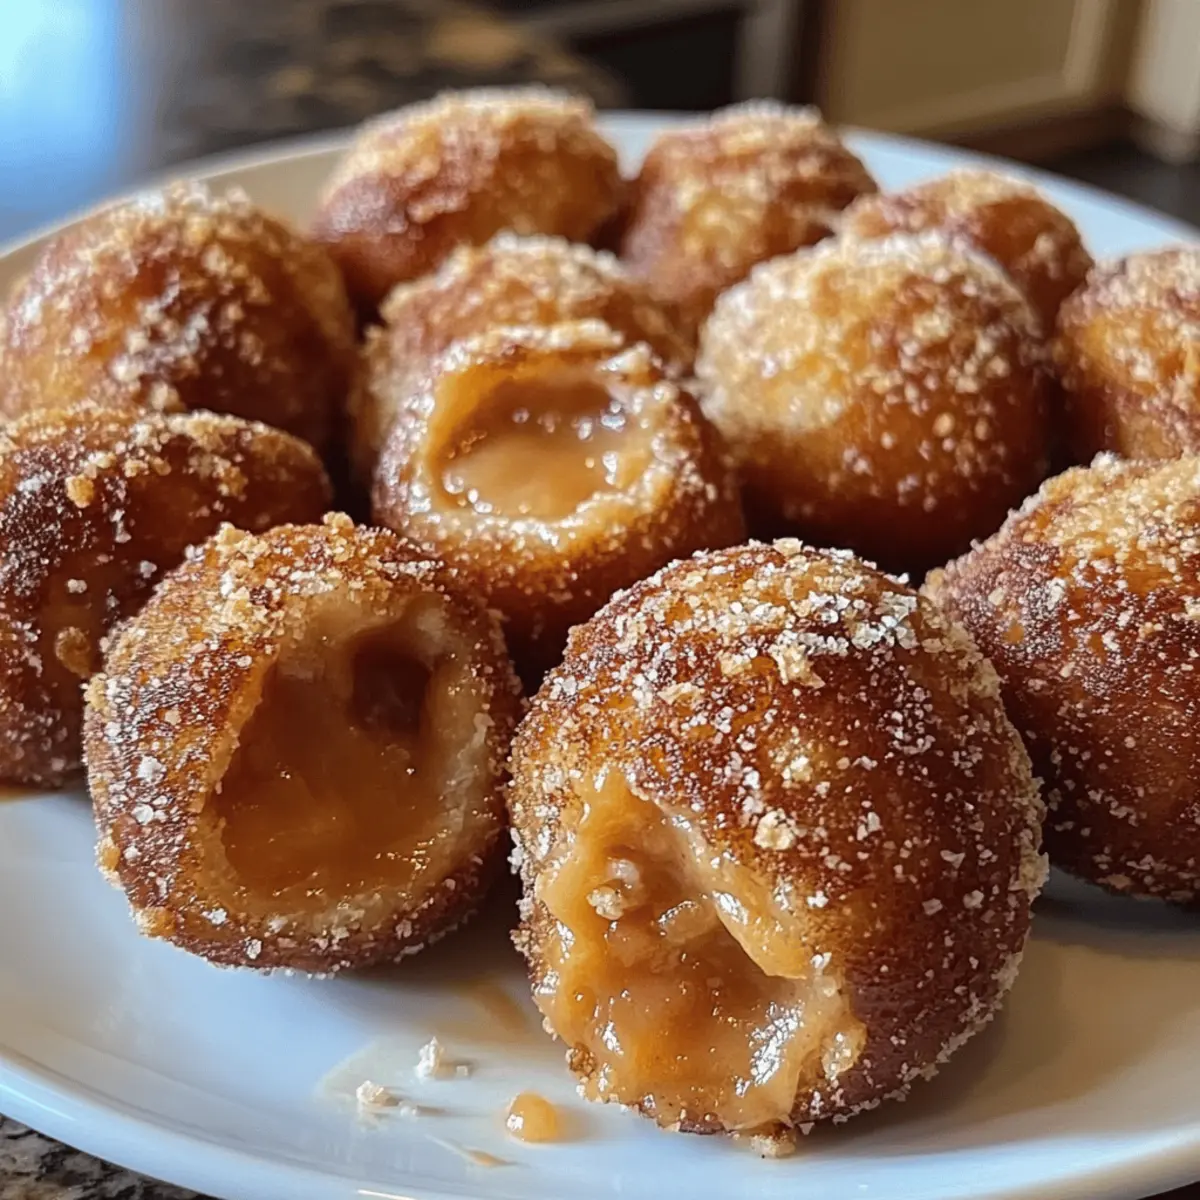
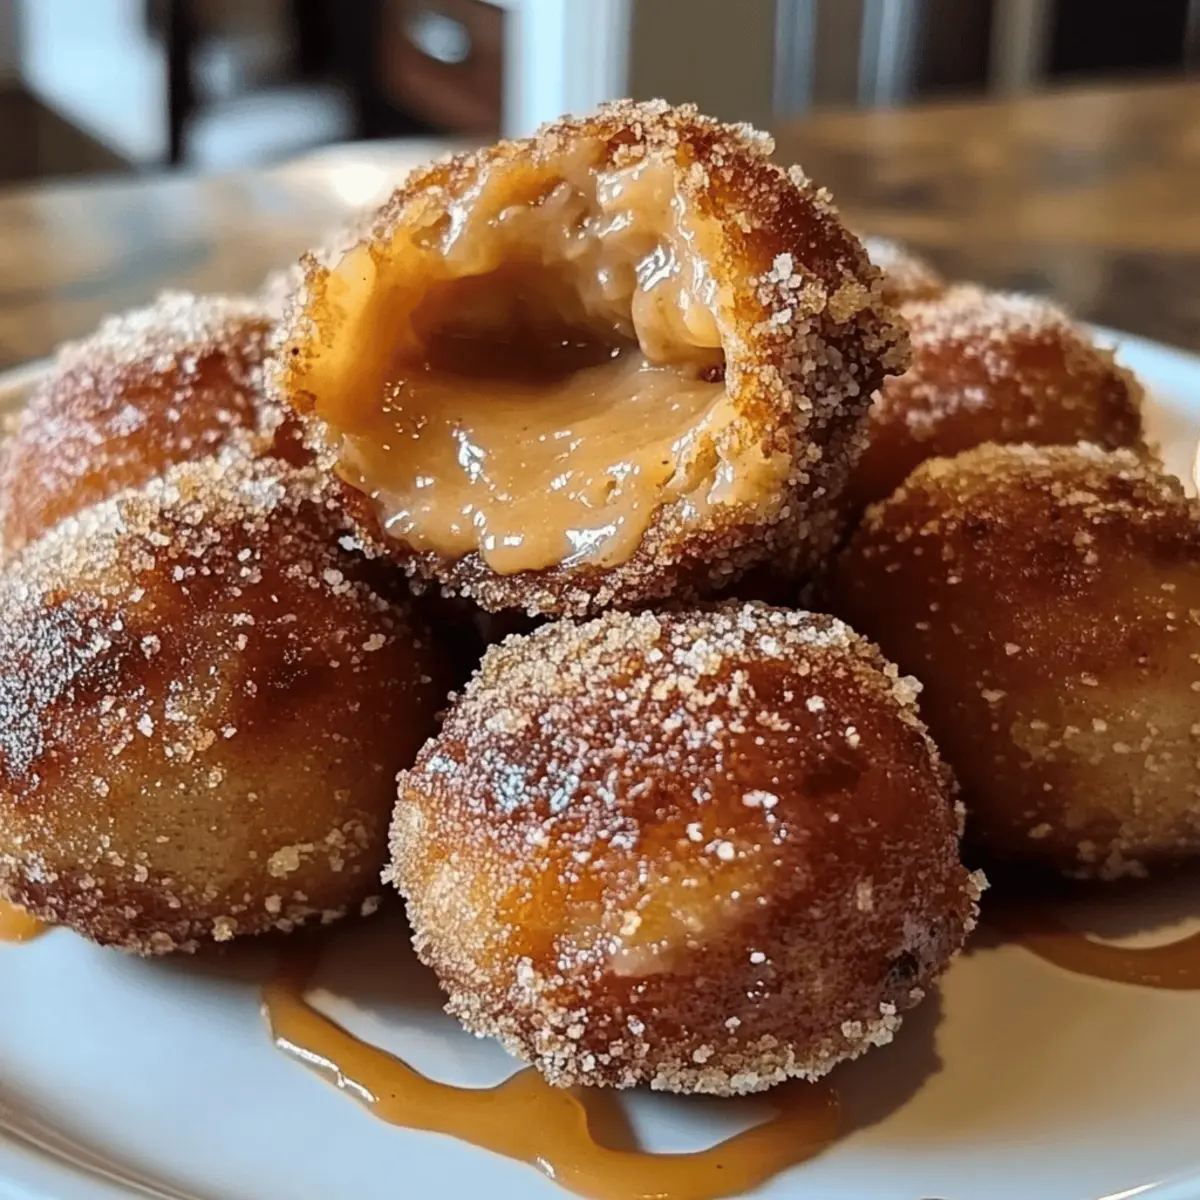
As I watched my kids trade candy bar wrappers for smiles, I realized how much joy those sweet little moments bring. Today, I’m excited to share my beloved recipe for Butterfinger Balls, which perfectly combines the crunchy allure of peanut butter candy with creamy decadence. These delicious bites are not only simple to whip up, but they’re also a fantastic treat for gatherings or a special indulgence just for you. With a creamy peanut butter center coated in luscious chocolate, they’re bound to please anyone tired of fast food and excited for homemade delights. Plus, you can customize them with decorations like sprinkles or a drizzle of chocolate for an added touch of flair! Ready to bring back that sweet nostalgia into your kitchen? Let’s start rolling!
Why are Butterfinger Balls irresistible?
Decadent, these Butterfinger Balls are the ultimate treat for candy lovers, offering a delightful blend of creamy and crunchy textures that’ll take you back to your childhood. Easy to make, they come together in just 20 minutes, perfect for quick gratification or last-minute gatherings. Customizable, you can jazz them up with colorful sprinkles or drizzles for a fun twist. Impressive in presentation, they look great on any dessert platter and are sure to wow your guests. No baking required, making these balls a hassle-free option for everyone from novice cooks to seasoned chefs. Dive into nostalgia and enjoy a homemade indulgence that beats fast food any day!
Butterfinger Balls Ingredients
Ready to create some scrumptious Butterfinger Balls? Here’s everything you'll need!
For the Base
• Crushed crunchy peanut butter candy bars – 1 ½ cups provides that signature Butterfinger crunch.
• Creamy peanut butter – ½ cup adds a rich, velvety texture to the mix.
• Powdered sugar – 2 cups sweetens the treat and helps bind the ingredients together.
• Vanilla extract – 1 teaspoon enhances the overall flavor with a warm, comforting note.
For the Coating
• Milk chocolate chips or chopped chocolate – 1 ½ cups melt beautifully for dipping and add a luscious finish.
For Decoration (Optional)
• Sprinkles, crushed candy, or drizzle of chocolate – these fun toppings elevate the visual appeal and give a personal touch!
Now you’re all set to whip up these delightful Butterfinger Balls!
Step‑by‑Step Instructions for Butterfinger Balls
Step 1: Prepare the Mixture
In a large mixing bowl, combine 1 ½ cups of crushed crunchy peanut butter candy bars, ½ cup of creamy peanut butter, 2 cups of powdered sugar, and 1 teaspoon of vanilla extract. Using a sturdy spatula or your hands, mix everything until you achieve a smooth, well-combined mixture. It should be slightly sticky yet hold together when pressed—about 3-4 minutes of mixing should do the trick.
Step 2: Form the Balls
Once your Butterfinger mixture is ready, take about 1 tablespoon of the mixture and roll it into a ball between your hands. Aim for uniform size for a consistent appearance. Place each ball onto a parchment-lined baking sheet, ensuring they are spaced evenly apart. Continue until you’ve formed all the mixture into balls; this should yield about 24.
Step 3: Chill the Balls
After shaping your Butterfinger Balls, refrigerate them for at least 30 minutes. This chilling time allows the balls to firm up, making them sturdier for chocolate coating later. When you check back, the balls should feel firmer to the touch but still maintain their shape—perfect for the next step!
Step 4: Melt the Chocolate
While the Butterfinger Balls chill, prepare to melt your chocolate coating. In a microwave-safe bowl, add 1 ½ cups of milk chocolate chips and heat them in 30-second intervals. Stir between intervals until the chocolate is fully melted and smooth, taking care not to overheat it, which can cause it to seize. Aim for a silky consistency that will easily coat the balls.
Step 5: Coat the Balls
Remove the chilled Butterfinger Balls from the refrigerator. Using a fork, dip each ball into the melted chocolate, ensuring it’s fully coated. Gently tap the fork on the bowl’s edge to remove excess chocolate, then place the dipped ball back onto the parchment-lined baking sheet. Repeat until all the balls are coated, creating a delightful chocolate shell around each one.
Step 6: Add Decorations
Before the chocolate sets, feel free to get creative with decorations! Optionally sprinkle crushed candy, colorful sprinkles, or a drizzle of contrasting chocolate over each ball. This step adds a fun touch and personalizes your Butterfinger Balls, making them even more appealing for sharing—or for indulging solo!
Step 7: Store and Enjoy
Allow your chocolate-coated Butterfinger Balls to set at room temperature until the chocolate hardens, which should take about 15-20 minutes. After they’re fully set, store them in an airtight container in the refrigerator for up to a week. Whether you enjoy them chilled or at room temperature, each bite is sure to bring a smile!
How to Store and Freeze Butterfinger Balls
Fridge: Store your Butterfinger Balls in an airtight container in the refrigerator for up to 1 week. This keeps them fresh and ready for indulgence!
Freezer: For longer storage, freeze your Butterfinger Balls by placing them in a single layer on a parchment-lined tray until firm, then transfer to a freezer-safe bag. They can last up to 3 months.
Thawing: To enjoy frozen Butterfinger Balls, transfer them to the fridge to thaw overnight. This gentle thawing helps retain their delicious texture.
Reheating: Serve chilled or at room temperature for the best taste experience. You can enjoy them straight from the fridge—no reheating necessary!
Butterfinger Balls Variations & Substitutions
Feel free to add your unique twist to these delightful Butterfinger Balls!
- Dairy-Free: Use dark chocolate chips instead of milk chocolate to keep this treat dairy-free without compromising flavor.
- Nut-Free: Swap creamy peanut butter for sun butter; it provides a similar texture and taste without the nuts.
- Sugar-Free: Substitute powdered sugar with a sugar-free alternative like erythritol for a lighter version that still satisfies your sweet cravings.
- Texture Boost: Add crushed pretzels to the mixture for an exciting salty crunch that beautifully contrasts the sweetness.
- Flavor Infusion: Mix in a tablespoon of cocoa powder for an extra chocolatey flavor or add a hint of sea salt for a savory balance.
- Heat It Up: Stir in a pinch of cayenne pepper for a spicy kick that pairs surprisingly well with the sweetness of the chocolate.
- Energizing Addition: Incorporate chia seeds or flaxseeds into the peanut butter mixture to boost nutrition while keeping that delectable taste.
- Seasonal Twist: For a festive touch, add a dash of pumpkin spice or cinnamon for seasonal Butterfinger Balls perfect for autumn gatherings!
Tips for the Best Butterfinger Balls
• Chilling Matters: Always chill the balls for at least 30 minutes. This step ensures they hold their shape when coated with chocolate, preventing a messy experience.
• Chocolate Melting: Melt chocolate in 30-second intervals and stir thoroughly. Overheating can cause chocolate to seize, making it unusable for coating your Butterfinger Balls.
• Skip the Clumps: Make sure the crushed candy bars are finely crushed. Large chunks can make rolling difficult and affect the texture of your Butterfinger Balls.
• Uniform Sizing: Roll each ball to a uniform size for consistent coating and a better presentation. Aim for about 1 tablespoon per ball.
• Get Creative: Don't hesitate to personalize your Butterfinger Balls with different toppings. Crushed candy or sprinkles can add a delightful crunch and visual appeal.
• Storage Tips: Store in an airtight container in the fridge for up to a week. Chilling enhances the flavors and keeps them fresh for indulgence later!
Make Ahead Options
These Butterfinger Balls are perfect for busy home cooks who want to save time without sacrificing flavor! You can prepare the mixture and form the balls up to 24 hours in advance, simply refrigerating the rolled balls before coating them in chocolate. This ensures they firm up nicely and maintain their shape—just be sure to keep them tightly covered to prevent drying out. When you're ready to finish, melt your chocolate and coat the chilled balls as instructed. This way, you’ll have a delicious homemade treat ready for any occasion or snack craving, with minimal effort when it’s time to serve!
What to Serve with Butterfinger Balls
Enjoy these delightful bites as part of a well-rounded dessert experience.
- Vanilla Ice Cream: A scoop of creamy vanilla ice cream adds a refreshing contrast to the rich flavors of Butterfinger Balls.
- Fruit Salad: Fresh, tangy fruit can lighten up the sweetness, refreshing your palate between bites. A medley of berries or citrus adds vibrant color, too!
- Coffee or Espresso: Dark, robust coffee pairs excellently with the sweetness, enhancing the overall flavor experience while providing a comforting warmth.
- Chocolate Drizzle: Show off your creativity with an extra drizzle of chocolate over your Butterfinger Balls. This adds a touch of elegance and intensified flavor!
- Nutty Trail Mix: A handful of crunchy trail mix alongside enhances the texture, offering a delightful contrast to the soft, creamy centers of each ball.
- Milk or Almond Milk: Pair them with a glass of cold milk or almond milk for a nostalgic treat. The creamy beverage complements the crunchy peanut butter flavors perfectly.
- Spiced Chai: The warm spices in chai tea balance the sweetness beautifully. Enjoying this pairing creates a cozy, comforting snack time experience.
- Dark Chocolate Dipping Sauce: For an indulgent twist, whip up a warm dark chocolate dipping sauce. This adds extra richness and encourages interactive enjoyment!
- Fruity Smoothies: Blend up a fresh fruit smoothie to add a burst of flavor and healthiness, creating a guilt-free treat alongside your Butterfinger Balls.
Butterfinger Balls Recipe FAQs
How do I choose the right crushed candy bars?
Absolutely! When selecting the crunchy peanut butter candy bars, look for bars that are crispy and not too old, as fresher bars will provide the best crunch and flavor. If you see dark spots all over, that may indicate they are past their prime. I often recommend brands like Butterfinger or similar crunchy bars for that perfect taste.
What’s the best way to store Butterfinger Balls?
Very! To keep your Butterfinger Balls fresh, store them in an airtight container in the refrigerator. They can last for up to 1 week this way. If you're preparing them for a gathering, make sure to pull them out an hour before serving so they can reach room temperature and enhance that creamy flavor!
Can I freeze Butterfinger Balls?
Definitely! To freeze, lay your Butterfinger Balls in a single layer on a parchment-lined baking tray and freeze until they’re solid. Then, transfer them into a freezer-safe bag or container, where they can stay good for up to 3 months. When you're ready to enjoy them, simply transfer them to the fridge to thaw overnight—easy and yummy!
What should I do if my chocolate coating is too thick?
If your chocolate seems overly thick, it may have been overheated or not enough fat was added. To fix this, simply add a small amount of vegetable oil or coconut oil—around 1 teaspoon at a time—until it reaches your desired consistency. This will help create a smoother coating for your Butterfinger Balls!
Are Butterfinger Balls suitable for pets?
No, it’s best to keep these treats away from pets. The chocolate and sugary ingredients can pose health risks to animals. If you want to indulge your furry friends, consider making pet-safe treats with peanut butter (without sugar or additives) and oats instead!
Can I modify ingredients for dietary restrictions?
Certainly! If you or someone you know has dietary considerations, you can substitute ingredients. For instance, use dairy-free chocolate chips for a vegan option or powdered sugar alternatives like coconut sugar for a healthier twist. Always adjust the quantities accordingly, and feel free to get creative!
Indulgent Butterfinger Balls That Will Satisfy Your Sweet Tooth
Ingredients
Equipment
Method
- In a large mixing bowl, combine crushed crunchy peanut butter candy bars, creamy peanut butter, powdered sugar, and vanilla extract. Mix until smooth and slightly sticky.
- Roll about 1 tablespoon of the mixture into a ball and place on a parchment-lined baking sheet. Repeat until all are formed.
- Refrigerate the balls for at least 30 minutes to firm them up.
- Melt milk chocolate chips in a microwave-safe bowl in 30-second intervals until fully smooth.
- Dip each chilled ball in the melted chocolate and place back on the baking sheet. Repeat for all.
- Before the chocolate sets, add any optional decorations like sprinkles or crushed candy.
- Let the chocolate harden at room temperature for about 15-20 minutes before storing.
Leave a Reply