
As I stood in my kitchen, the unmistakable aroma of sizzling beef and caramelizing onions whirled around me, triggering childhood memories that welcomed me like an old friend. These Classic Cheesy Sloppy Joe Sandwiches have a way of pulling me in, making every bite taste like home and nostalgia rolled into one. With quick prep and just a handful of ingredients, this recipe transforms into an effortless weeknight meal that’s sure to please the whole family. Plus, the gooey sharp cheddar cheese melted over the spicy-sweet meat mixture is a delightful twist on a classic dish. Are you ready to dig into the deliciousness that awaits? Let's get started!

Why Are Cheesy Sloppy Joes Irresistible?
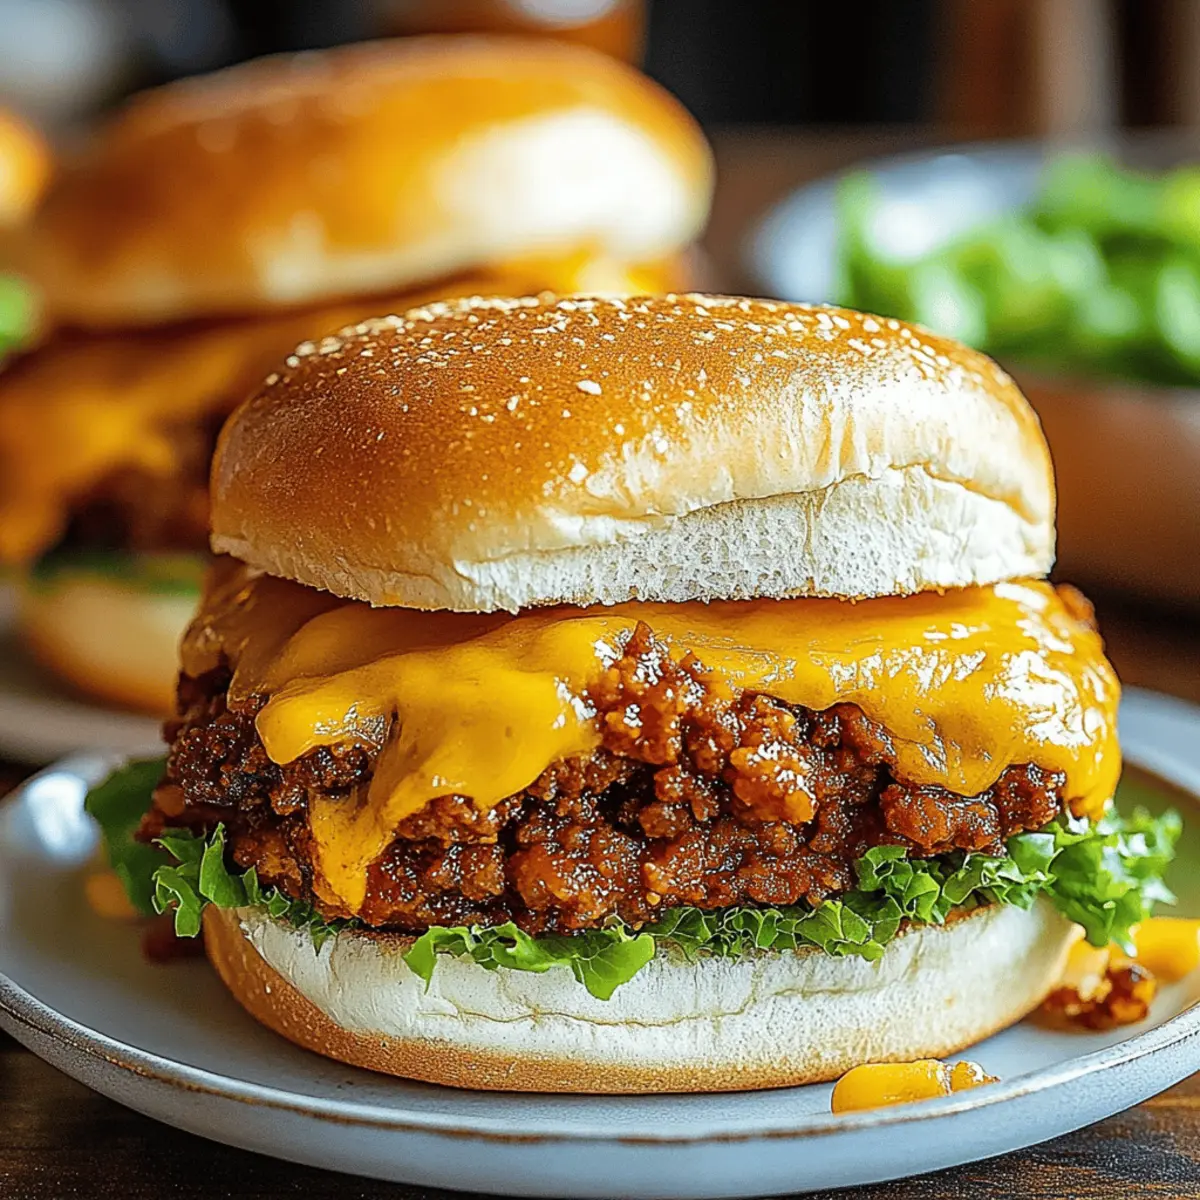
Comforting, Familiar Flavors: These Classic Cheesy Sloppy Joe Sandwiches evoke warm memories with their savory, sweet beef mixture and melted cheddar cheese.
Quick and Easy: With just 25 minutes total time, you can whip up this delightful meal on busy nights.
Crowd-Pleasing: Perfect for family dinners or casual gatherings, everyone will love digging into these hearty sandwiches.
Versatile Options: Feel free to customize with your favorite toppings, like lettuce or a dash of hot sauce, to tailor them to your taste!
Minimal Ingredients: This recipe uses everyday pantry staples, making it both accessible and budget-friendly. Enjoy a flavorful feast without the fuss!
Cheesy Sloppy Joe Sandwiches Ingredients
For the Meat Mixture
• 1 lb ground beef – 80/20 is preferred for a juicy texture.
• 1 tablespoon olive oil – Use only if using lean beef to prevent stickiness.
• 1 small yellow onion – Finely diced for a sweet flavor that enhances the dish.
• 2 cloves garlic – Minced to infuse the mixture with aromatic goodness.
• ¾ cup ketchup – This brings a sweet and tangy base to your sloppy joe sauce.
• 1 tablespoon tomato paste – Adds depth and richness to the flavor.
• 1 tablespoon Worcestershire sauce – Balances the sweetness with its savory notes.
• 2 teaspoons yellow mustard – A tangy twist that brightens the overall taste.
• 1 tablespoon brown sugar – Enhances the sweet balance in your Cheesy Sloppy Joe Sandwiches.
• ½ teaspoon smoked paprika (optional) – Adds a subtle smokiness for an extra layer of flavor.
• Salt and black pepper to taste – Essential seasonings to make everything pop!
For Serving
• 4 brioche or hamburger buns – Ideally toasted for that perfect bite.
• 1 cup sharp cheddar cheese – Freshly grated for effortless melting magic.
• Lettuce leaves (optional) – Adds a crisp texture and freshness to each mouthful.
• Mayonnaise or butter (optional) – Use to toast your buns and enhance their flavor.
Step‑by‑Step Instructions for Cheesy Sloppy Joe Sandwiches
Step 1: Brown the Beef
Begin by heating a large skillet over medium-high heat. If using lean ground beef, drizzle in a tablespoon of olive oil to ensure it doesn't stick. Add 1 lb of ground beef and cook for 4–5 minutes, breaking it apart with a spatula until it’s nicely browned. Drain any excess grease if necessary for a cleaner taste.
Step 2: Sauté Onions and Garlic
With the beef browned, add one finely diced small yellow onion to the skillet. Sauté for 2–3 minutes until the onion becomes soft and translucent. Add in 2 minced cloves of garlic and stir for about 30 seconds until fragrant, making sure not to let it burn. The aroma will set the stage for delicious Cheesy Sloppy Joe Sandwiches.
Step 3: Create the Sauce
Reduce the heat to medium and carefully introduce the flavorful sauce ingredients. Add ¾ cup of ketchup, 1 tablespoon of tomato paste, 1 tablespoon of Worcestershire sauce, 2 teaspoons of yellow mustard, 1 tablespoon of brown sugar, and optional ½ teaspoon of smoked paprika. Mix everything thoroughly, season with salt and black pepper, and let it simmer for 5–7 minutes until the mixture thickens and the flavors meld beautifully.
Step 4: Toast the Buns
While the meat mixture simmers, it's time to prepare the buns! Toast 4 brioche or hamburger buns in a skillet over medium heat or in a toaster. If you like, spread a little mayonnaise or butter on the insides to get them golden and crispy. This will add an extra layer of tempting flavor to your Cheesy Sloppy Joe Sandwiches.
Step 5: Assemble the Sandwiches
Now, it’s time to build your irresistible Cheesy Sloppy Joe Sandwiches! Start with the bottom bun, optionally placing crisp lettuce leaves for freshness. Generously scoop the meat mixture on top, and then sprinkle 1 cup of freshly grated sharp cheddar cheese over it. Finally, cap it with the top bun to complete this hearty masterpiece. Serve hot and enjoy the comforting flavors!

Make Ahead Options
These Classic Cheesy Sloppy Joe Sandwiches are perfect for busy home cooks looking to save time! You can prepare the luscious meat mixture up to 3 days in advance. Simply follow the cooking instructions through Step 3, then let it cool completely before transferring it to an airtight container. Refrigerate until you're ready to serve. When it's time to enjoy, just reheat the mixture on the stove over medium heat until warmed through, and continue with toasting your buns and adding the cheese as directed. This prep-ahead method keeps your sandwiches just as delicious while making meal night effortless and stress-free!
Cheesy Sloppy Joe Sandwiches Variations
Embrace your creativity by experimenting with these delightful twists to make this dish uniquely yours!
-
Lean Beef: Substitute ground turkey or chicken for a lighter version that's still packed with flavor.
-
Veggie-Packed: Add finely chopped bell peppers and mushrooms to the meat mixture for extra nutrition and texture.
-
Spicy Kick: Incorporate diced jalapeños or a splash of hot sauce into the mixture for a fiery flavor upgrade.
-
BBQ Twist: Replace ketchup with your favorite BBQ sauce for a smoky, tangy variation that adds bold taste.
-
Cheese Upgrade: Experiment with different cheeses like pepper jack or gouda for a unique melting experience.
-
Bun Options: Swap out brioche buns for whole wheat or gluten-free options, tailoring the meal to dietary needs.
-
Herb Infusion: Stir in fresh chopped herbs like parsley or cilantro right before serving for a fresh, bright flavor.
-
Breakfast Version: Use the mixture as a filling for scrambled eggs or on breakfast burritos for a delicious morning treat.
Expert Tips for Cheesy Sloppy Joe Sandwiches
-
Choose Quality Beef: Opt for 80/20 ground beef for the best texture and flavor. Leaner beef may result in a dry mixture, missing that juicy mouthfeel.
-
Don't Rush Simmering: Allow the meat mixture to simmer for the full 5–7 minutes. This ensures the flavors meld beautifully and thickens the sauce for optimal enjoyment.
-
Customizable Heat: Want an extra kick? Add some diced jalapeños or hot sauce to the meat mixture before serving. This twist brings an exciting flavor to your Cheesy Sloppy Joe Sandwiches!
-
Perfect Toasting: For extra flavor, toast your buns with butter or mayo until golden brown. This not only enhances their taste but also prevents them from getting soggy.
-
Save Leftovers Wisely: Store any leftover Cheesy Sloppy Joe mixture in an airtight container in the refrigerator. Reheat and serve over rice or pasta for a delicious variation!
How to Store and Freeze Cheesy Sloppy Joe Sandwiches
Fridge: Keep any leftover Cheesy Sloppy Joe mixture in an airtight container for up to 3 days. Enjoy it heated up for quick meals throughout the week.
Freezer: For longer storage, freeze the meat mixture in a resealable freezer bag or airtight container for up to 3 months. Thaw in the refrigerator overnight before reheating.
Reheating: Reheat the thawed mixture in a skillet over medium heat until warmed through, stirring occasionally. You can also microwave it in 30-second increments, stirring in between.
Storage Tips: If you plan to store assembled sandwiches, wrap them tightly in plastic wrap and refrigerate. Enjoy within 1 day for the best taste and texture.
What to Serve with Classic Cheesy Sloppy Joe Sandwiches
As you savor the melted cheese and flavorful beef, envision a delightful spread that brings harmony to your meal.
-
Crispy Coleslaw: This crunchy side provides a refreshing contrast to the savory sandwiches, brightening every bite with its tangy flavor.
-
Sweet Potato Fries: Their natural sweetness and crispy texture complement the rich, cheesy sloppy joes perfectly, offering a delightful balance.
-
Pickle Chips: A crunchy, briny addition that cuts through the richness of the sandwiches, making each bite feel refreshing and lively.
-
Creamy Macaroni and Cheese: The cheesy goodness enhances the meal's comfort factor, making it a true indulgent feast everyone will enjoy.
-
Spicy Potato Wedges: These seasoned wedges add a satisfying crunch and earthy flavor, pairing wonderfully with the cheesy sloppy joe sandwiches.
-
Homemade Tomato Soup: A warm, comforting bowl of soup can be perfect for dipping your sandwiches, creating a classic and nostalgic experience.
-
Sparkling Lemonade: Invigorating and refreshing, this drink adds a zesty note to balance the flavors while keeping the atmosphere light and cheerful.
-
Chocolate Chip Cookies: End the meal on a sweet note with warm, gooey cookies that will have everyone reaching for seconds!
Cheesy Sloppy Joe Sandwiches Recipe FAQs
What type of ground beef is best for Cheesy Sloppy Joe Sandwiches?
I recommend using 80/20 ground beef for the best balance of flavor and juiciness. The higher fat content ensures that the meat remains tender and flavorful. Leaner ground beef may work, but it can lead to a drier mixture, so keep that in mind for a delicious outcome!
How should I store leftover Cheesy Sloppy Joe mixture?
Store any remaining mixture in an airtight container in the fridge for up to 3 days. To reheat, simply warm it in a skillet over medium heat, stirring occasionally to ensure even heating. This makes for a quick lunch or dinner option throughout the week!
Can I freeze the Cheesy Sloppy Joe mixture?
Absolutely! For freezer storage, transfer the cooled meat mixture into a resealable freezer bag or an airtight container. It can be frozen for up to 3 months. When you’re ready to enjoy it again, just thaw it in the refrigerator overnight before reheating in a skillet or microwave.
How can I prevent my Sloppy Joe mixture from being too runny?
If you find your mixture is too loose, let it simmer uncovered for an additional 2-3 minutes. This allows excess liquid to evaporate, thickening the sauce. Additionally, ensure that you are using the right balance of ingredients—adding too much ketchup or Worcestershire sauce can contribute to excess moisture.
Are there any dietary considerations I should keep in mind?
When preparing Cheesy Sloppy Joe Sandwiches, be aware of any allergies among your guests. The classic recipe is not gluten-free due to the buns; however, you can easily substitute gluten-free buns or lettuce wraps for a low-carb option. Additionally, if anyone has a dairy allergy, consider using a cheese alternative or skipping the cheese altogether!
How long can assembled Cheesy Sloppy Joe Sandwiches be stored in the fridge?
If you’ve assembled the sandwiches, it’s best to consume them within 1 day for optimum taste and texture. Wrap them tightly in plastic wrap to help maintain their freshness. If you anticipate leftovers, consider storing the components separately to keep everything as delicious as possible!

Indulgent Cheesy Sloppy Joe Sandwiches for Cozy Nights
Ingredients
Equipment
Method
- Heat a large skillet over medium-high heat. If using lean ground beef, drizzle in olive oil. Add ground beef and cook for 4–5 minutes until browned.
- Add finely diced yellow onion to the skillet and sauté for 2–3 minutes until soft. Then, add minced garlic and stir for 30 seconds until fragrant.
- Reduce heat to medium and add ketchup, tomato paste, Worcestershire sauce, yellow mustard, brown sugar, and smoked paprika. Mix well, season with salt and pepper, and let simmer for 5–7 minutes until thickened.
- Toast the brioche or hamburger buns in a skillet or toaster. Optionally, spread mayonnaise or butter inside for added flavor.
- Assemble the sandwiches by placing lettuce on the bottom bun, adding the meat mixture, and sprinkling cheddar cheese on top. Cap with the top bun and serve hot.


Leave a Reply